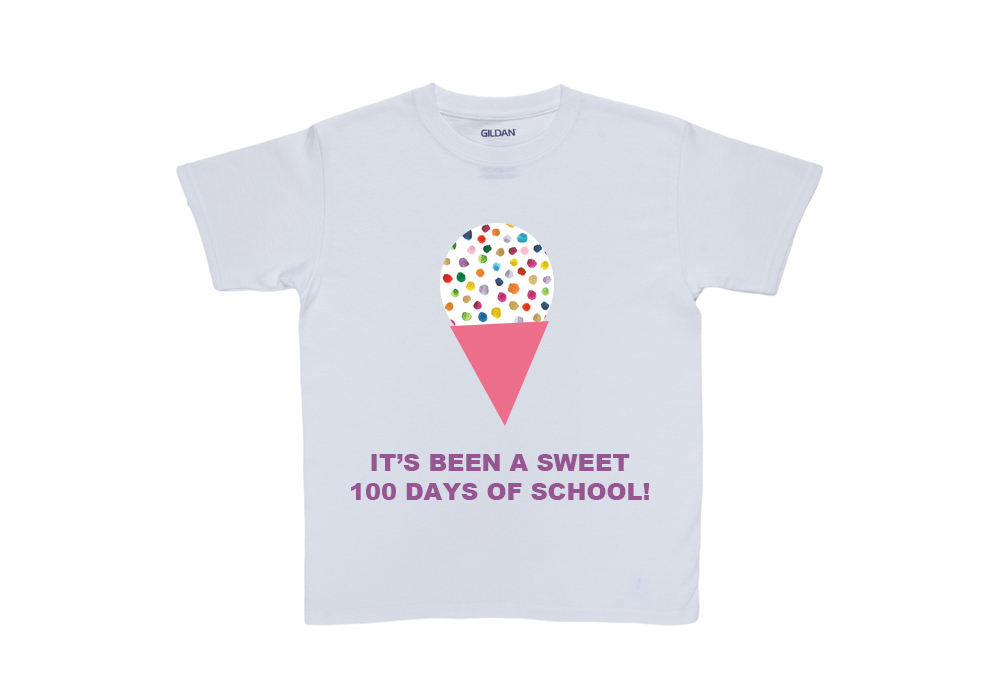
It’s that time of the year! 100 days of school! If you’re scrambling for a 100 days of school t-shirt or poster idea, we have a few for inspiration! Check out some of our favorite 100 days of school ideas! From 100 days brighter to 100 days of smiles, these are easy to do, won’t cost a ton of money and you don’t have to be the craftiest mom in town! Use puffy paint, iron-on letters, puffs, or felt to create each of these! You can use iron on glue or a glue gun to get everything to stay in place. You can also use these same designs on a poster! #100daysofschool #100daysofschooldiy #madebykidsco
100 days ideas, 100 days of school ideas, ideas for 100 days of school, 100 days of school shirts, 100 days of school poster, poster for 100 days of school, shirt for 100 days of school, shirt ideas for 100 days of school
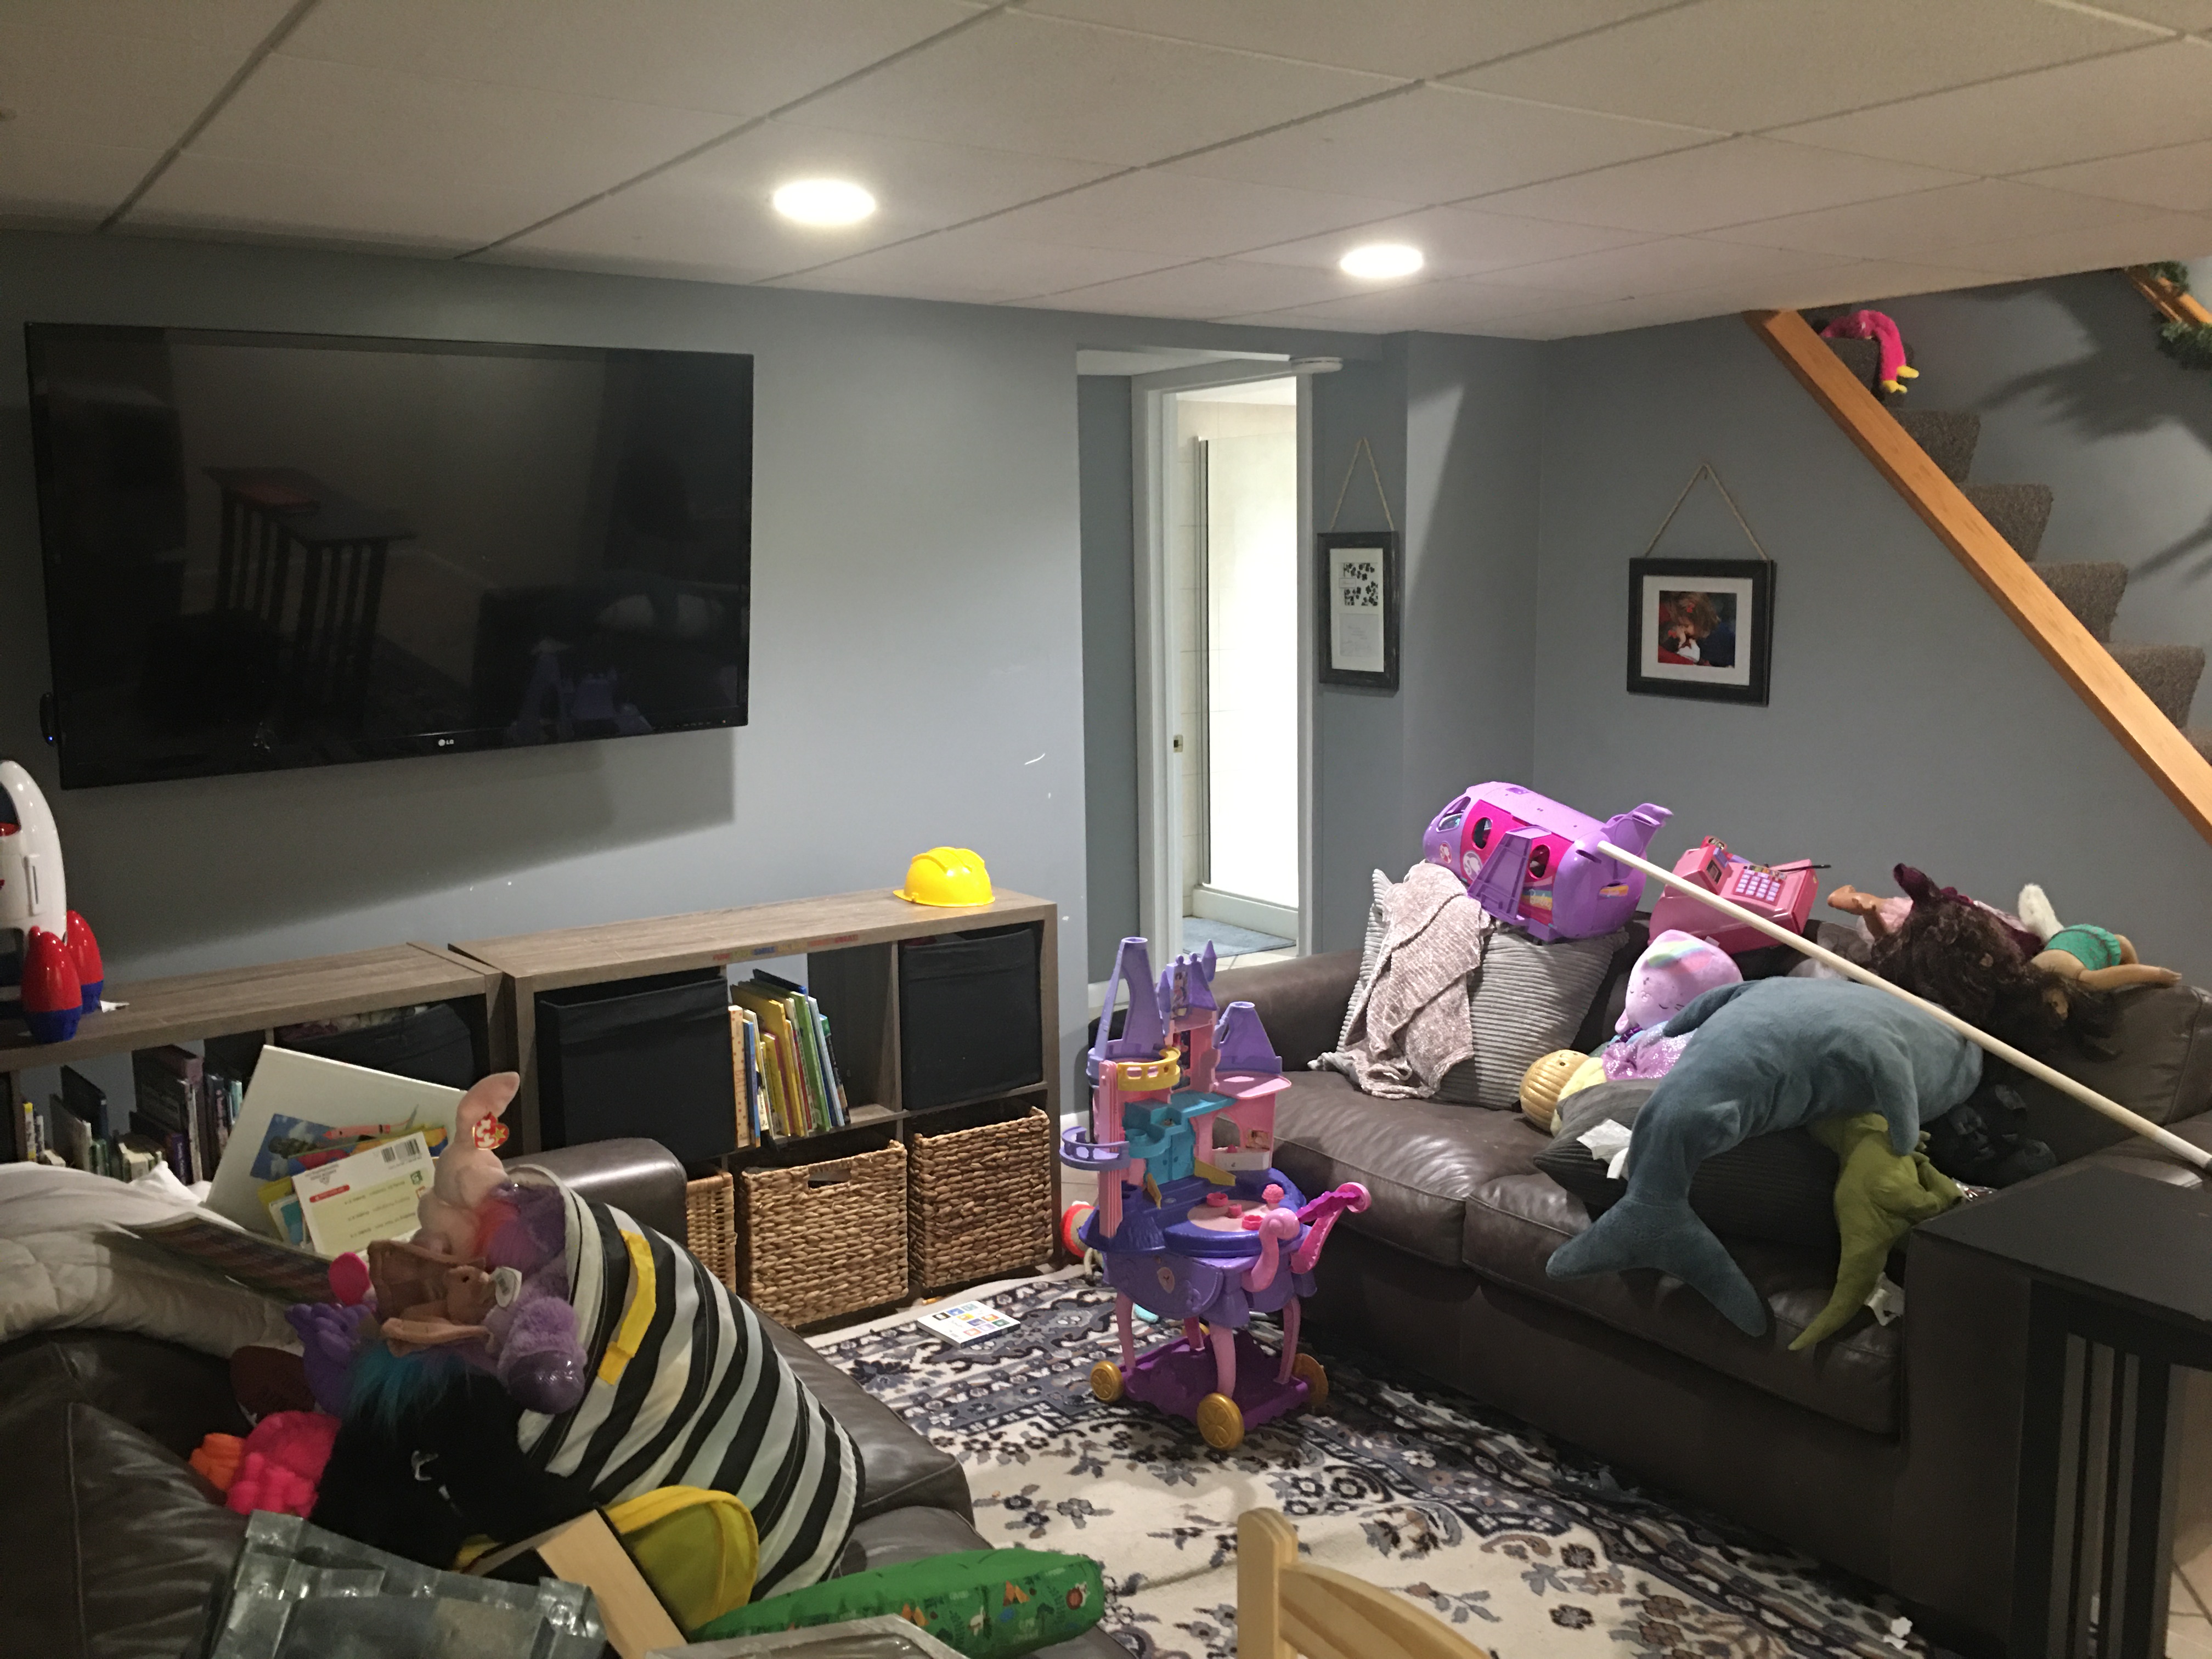
After Christmas, it was on our agenda to go through and donate a bunch of toys the kids have outgrown or no longer play with. Our basement is a smaller space and while there’s plenty of room to watch a movie or play, there isn’t enough space for hundreds of plastic toys. When we decided to refresh our basement, we wanted to do so without spending much money and without creating more storage for toys. Instead, if the toys didn’t fit into our current storage solutions, off to the donation center they went! Check out our $100 weekend playroom makeover.
If you’re looking to re-organize your playroom or give do a quick playroom makeover, the best thing you can do is to declutter. Decluttering doesn’t cost you anything and you can do it as often as you’d like. While I painted and created a cute mini-playschool in this refresh, decluttering made the most impact.
Step 2: Paint
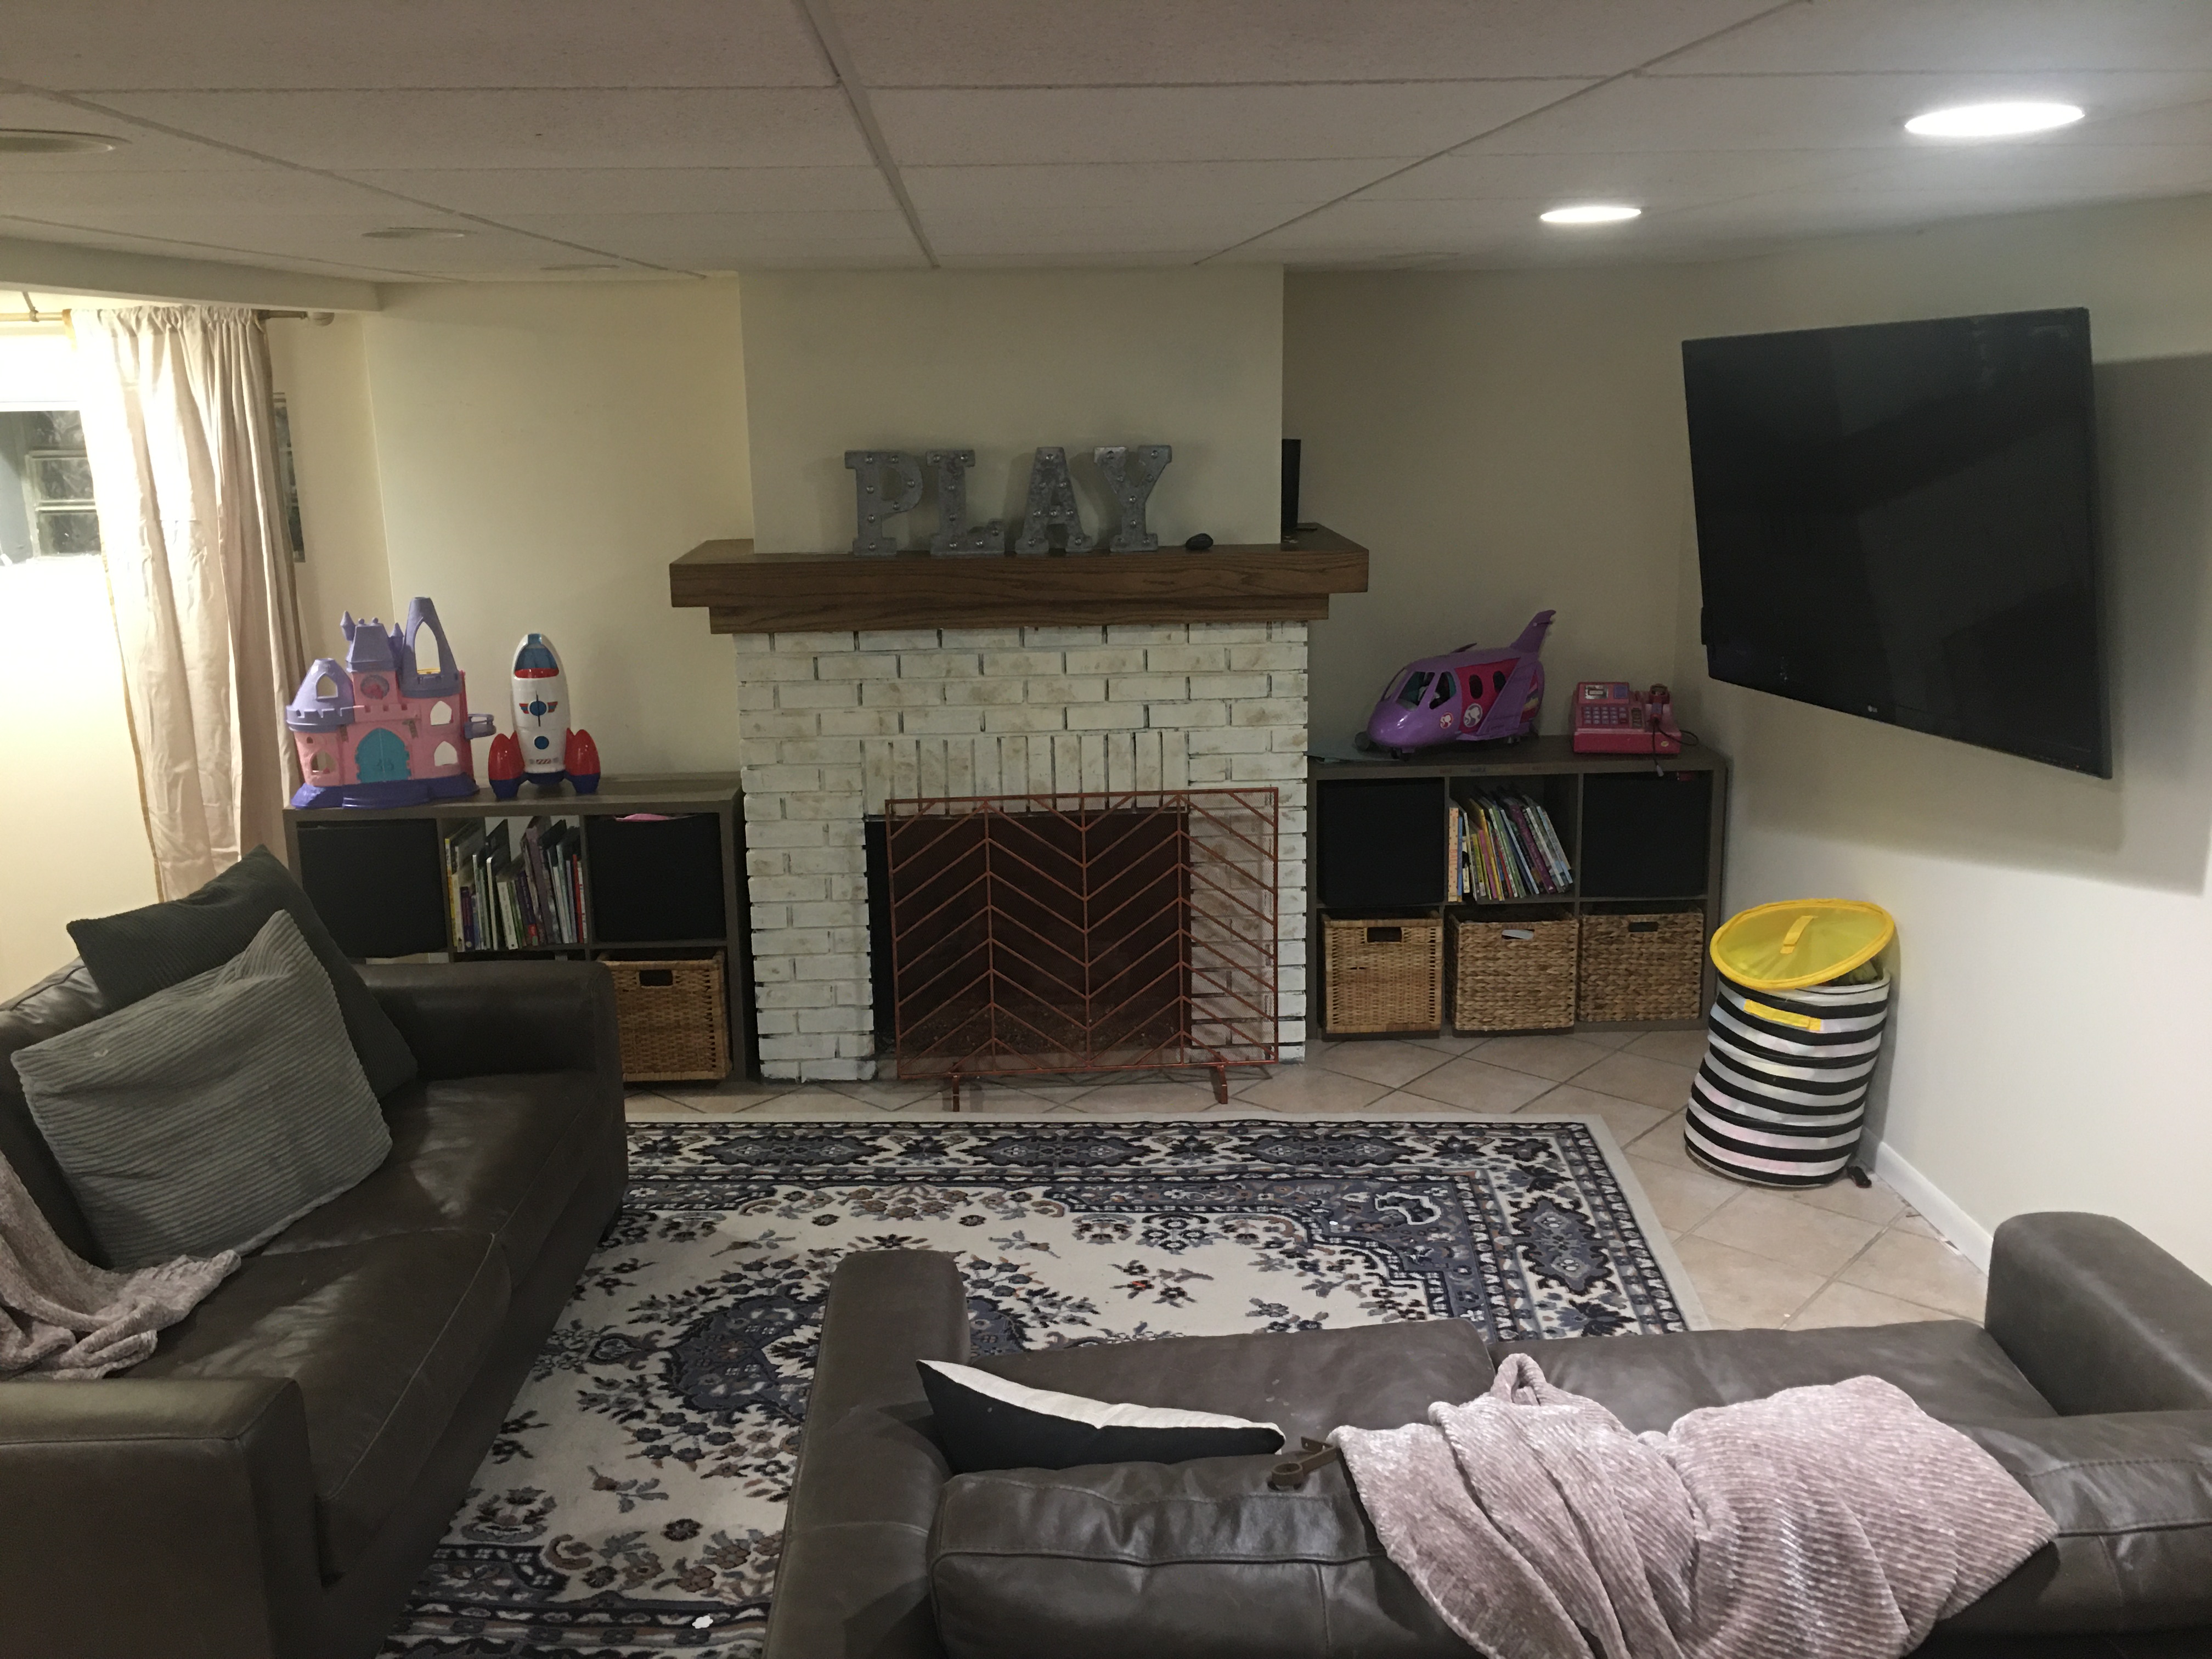
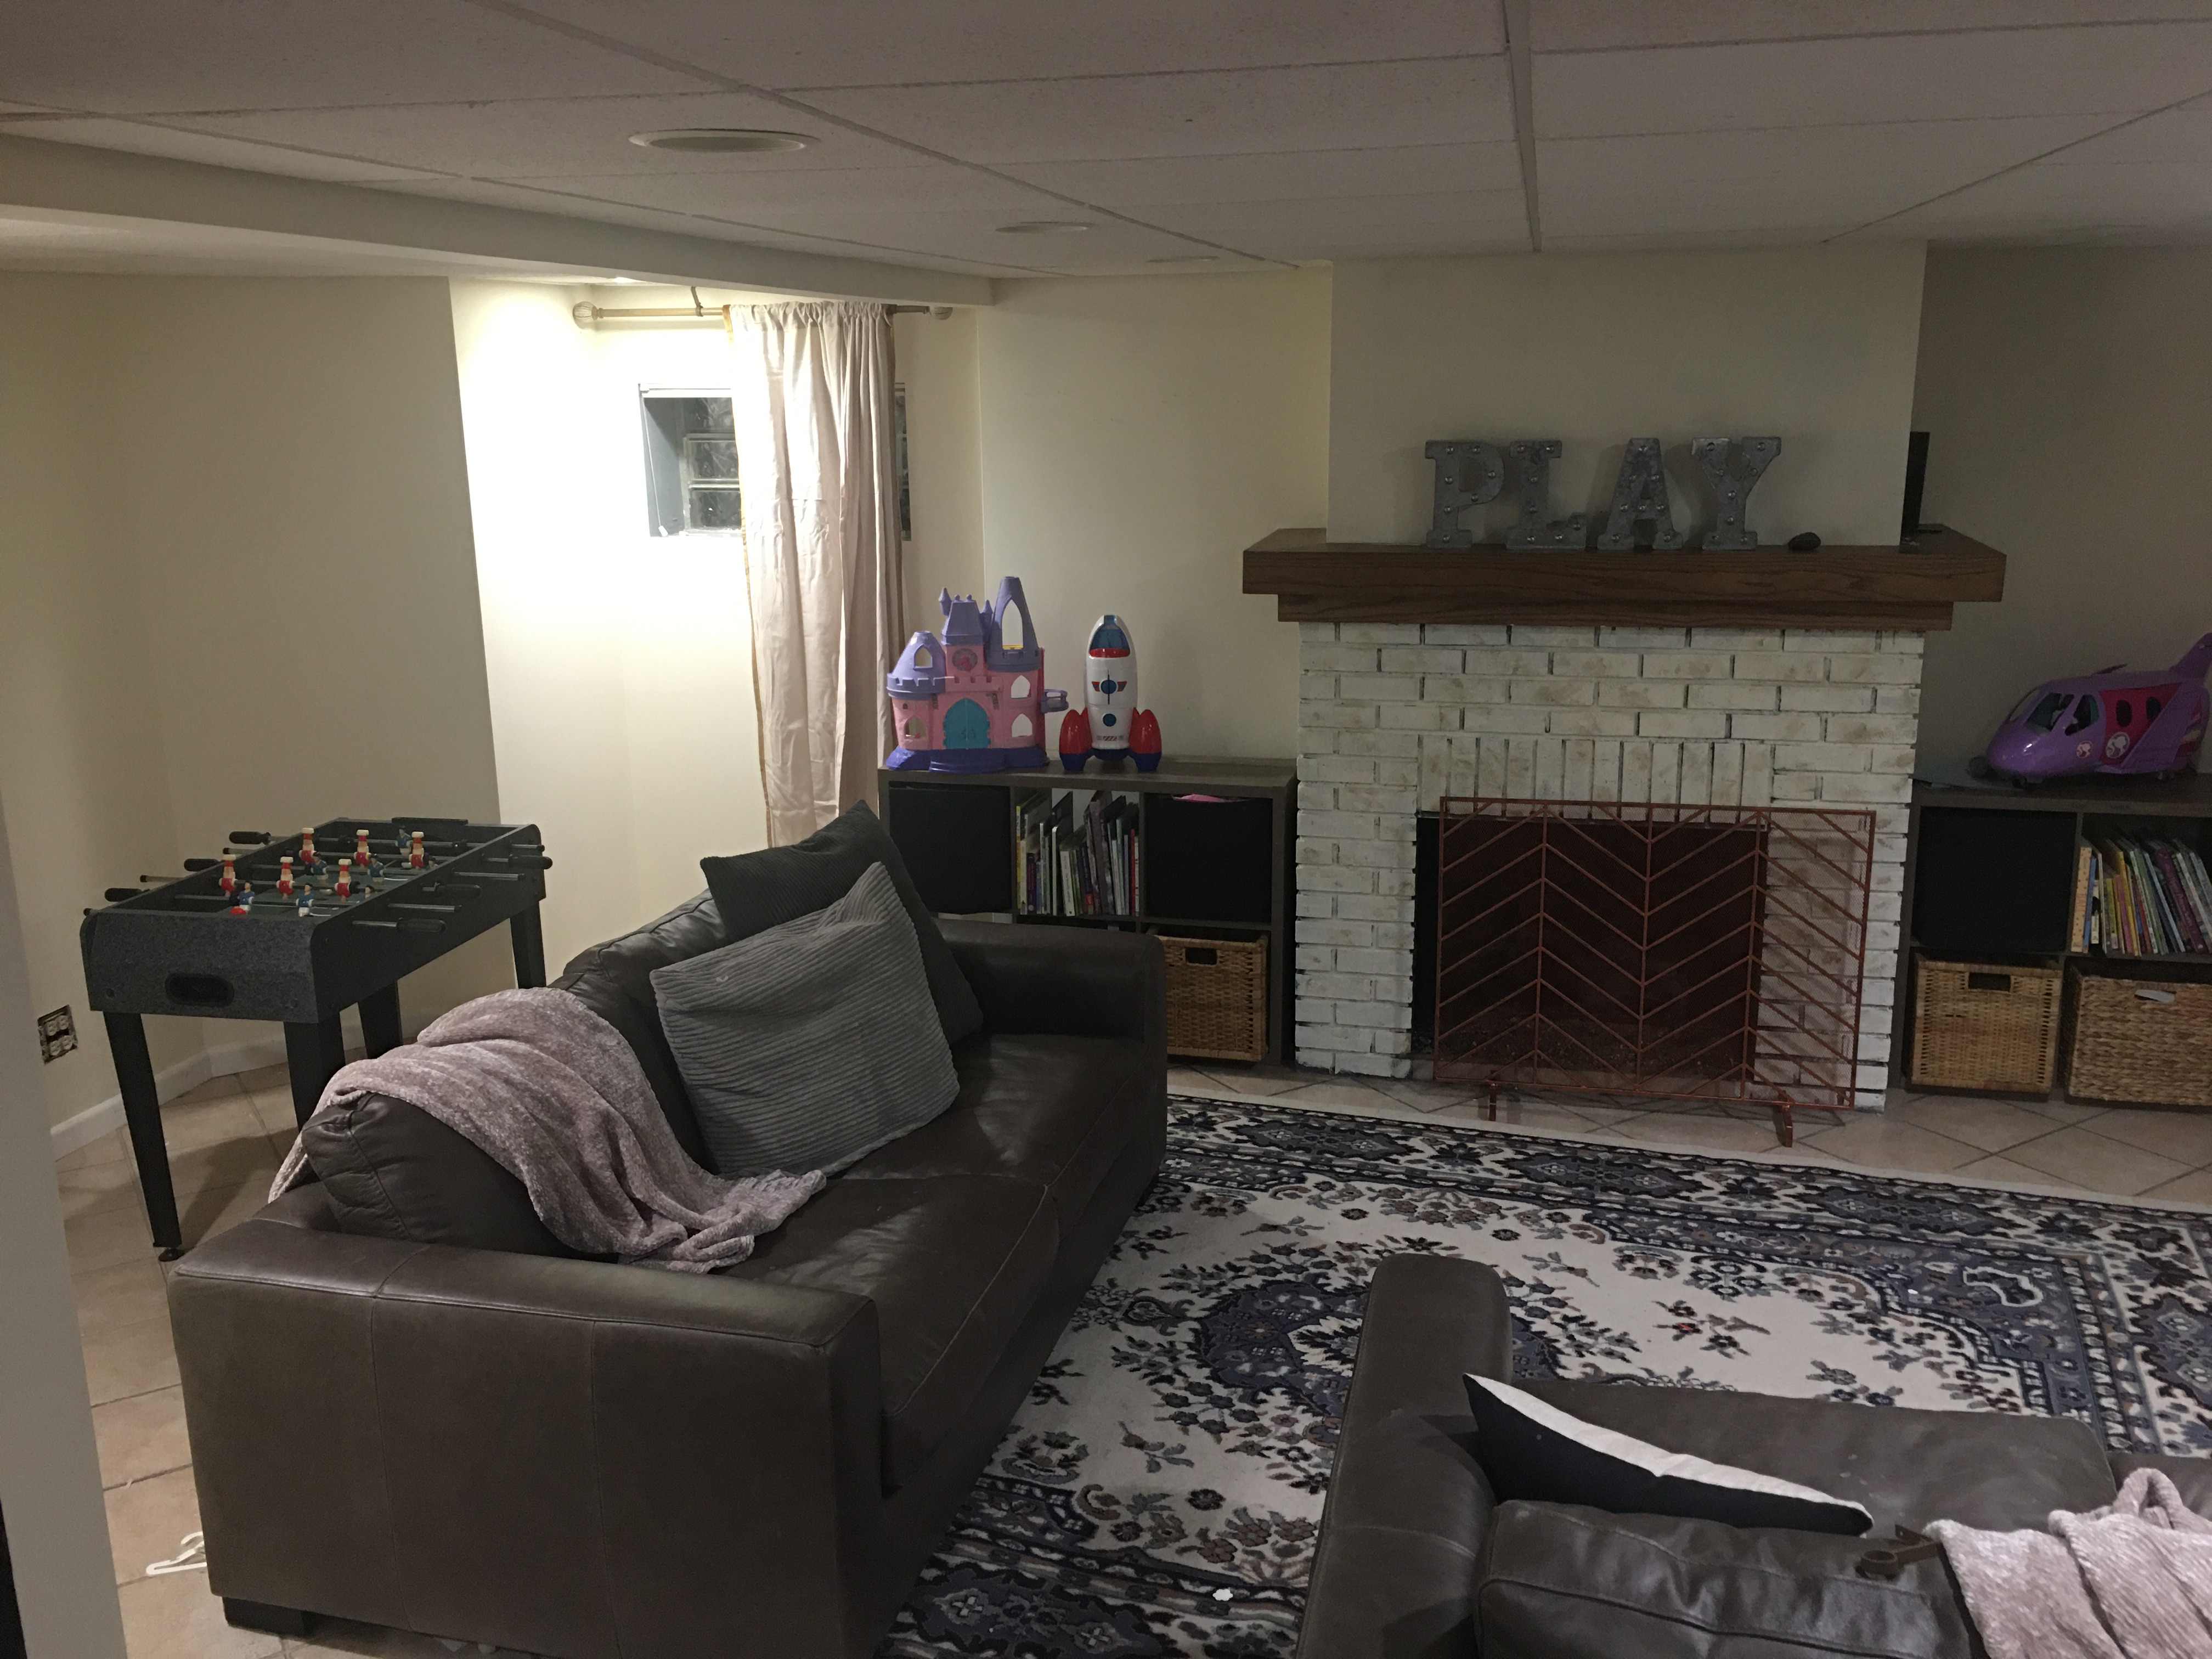
Our basement was a blue/gray color and since we only have one window down there it made it feel pretty dark. While I love the look of a dark-colored and moody basement, I wanted to brighten ours up. The color I chose is Behr, Cotton Knit. I used it on the walls and the fireplace.
Step 3: Re-Imagine an Unused Nook
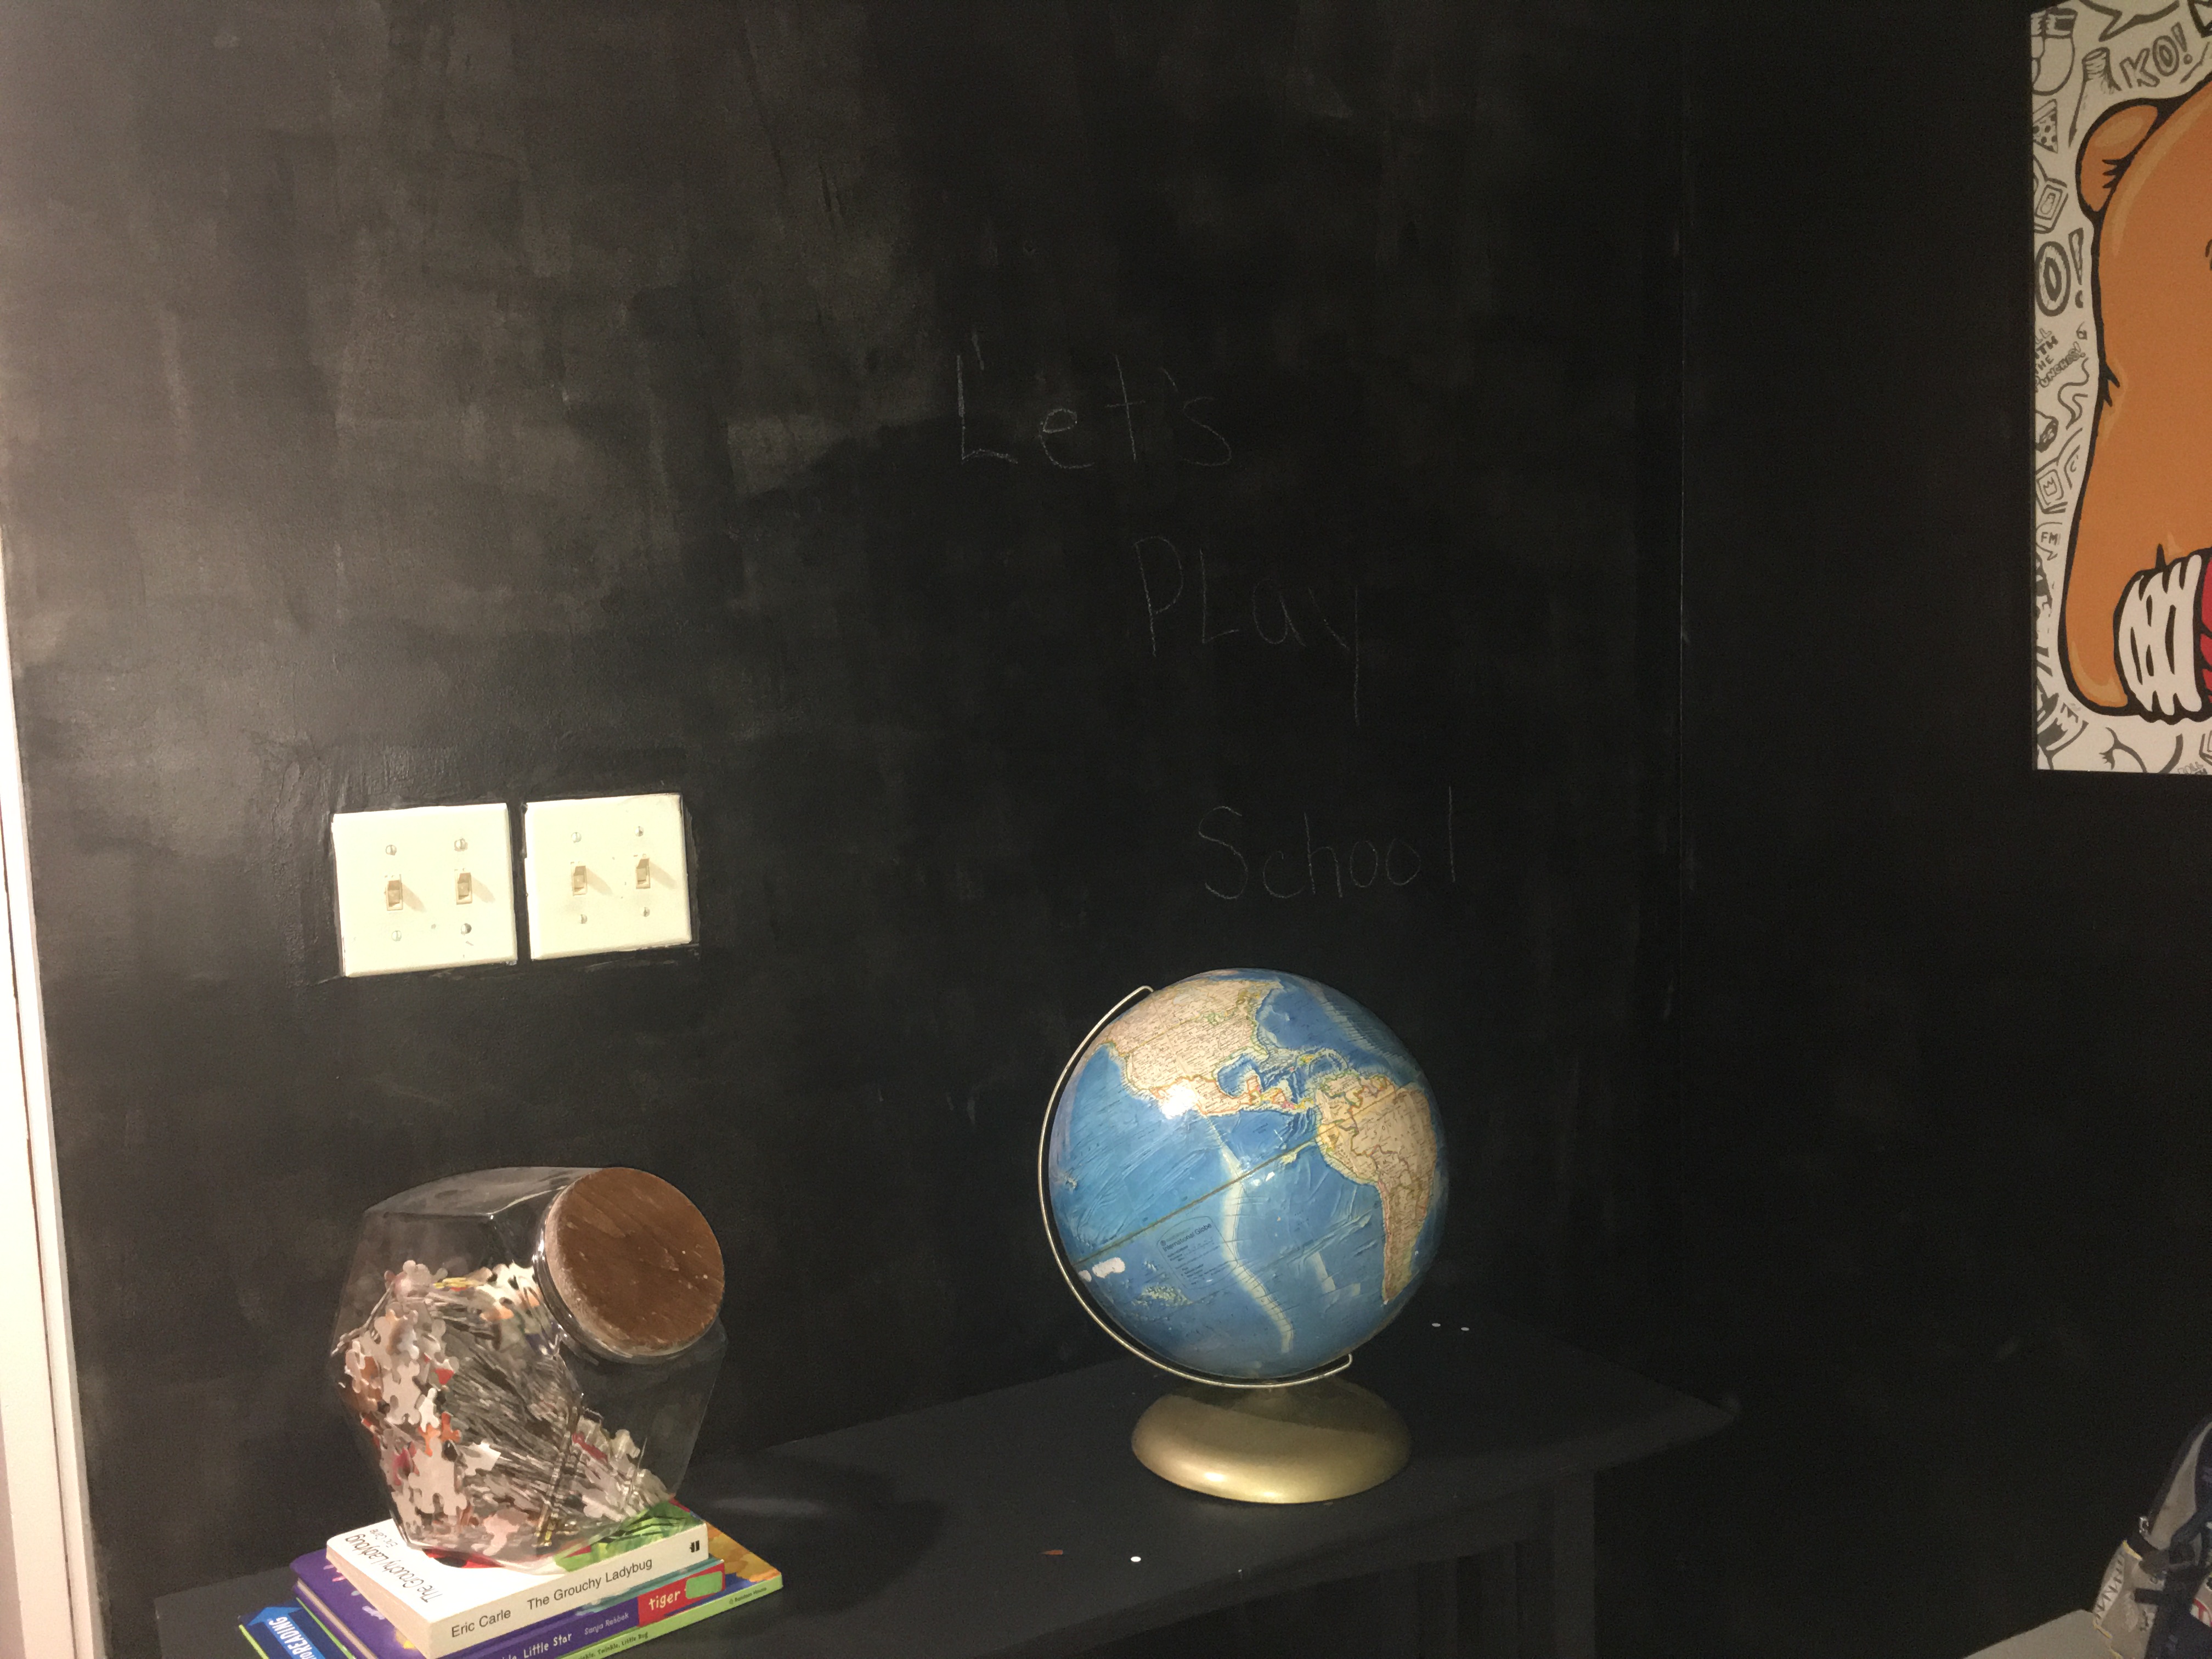
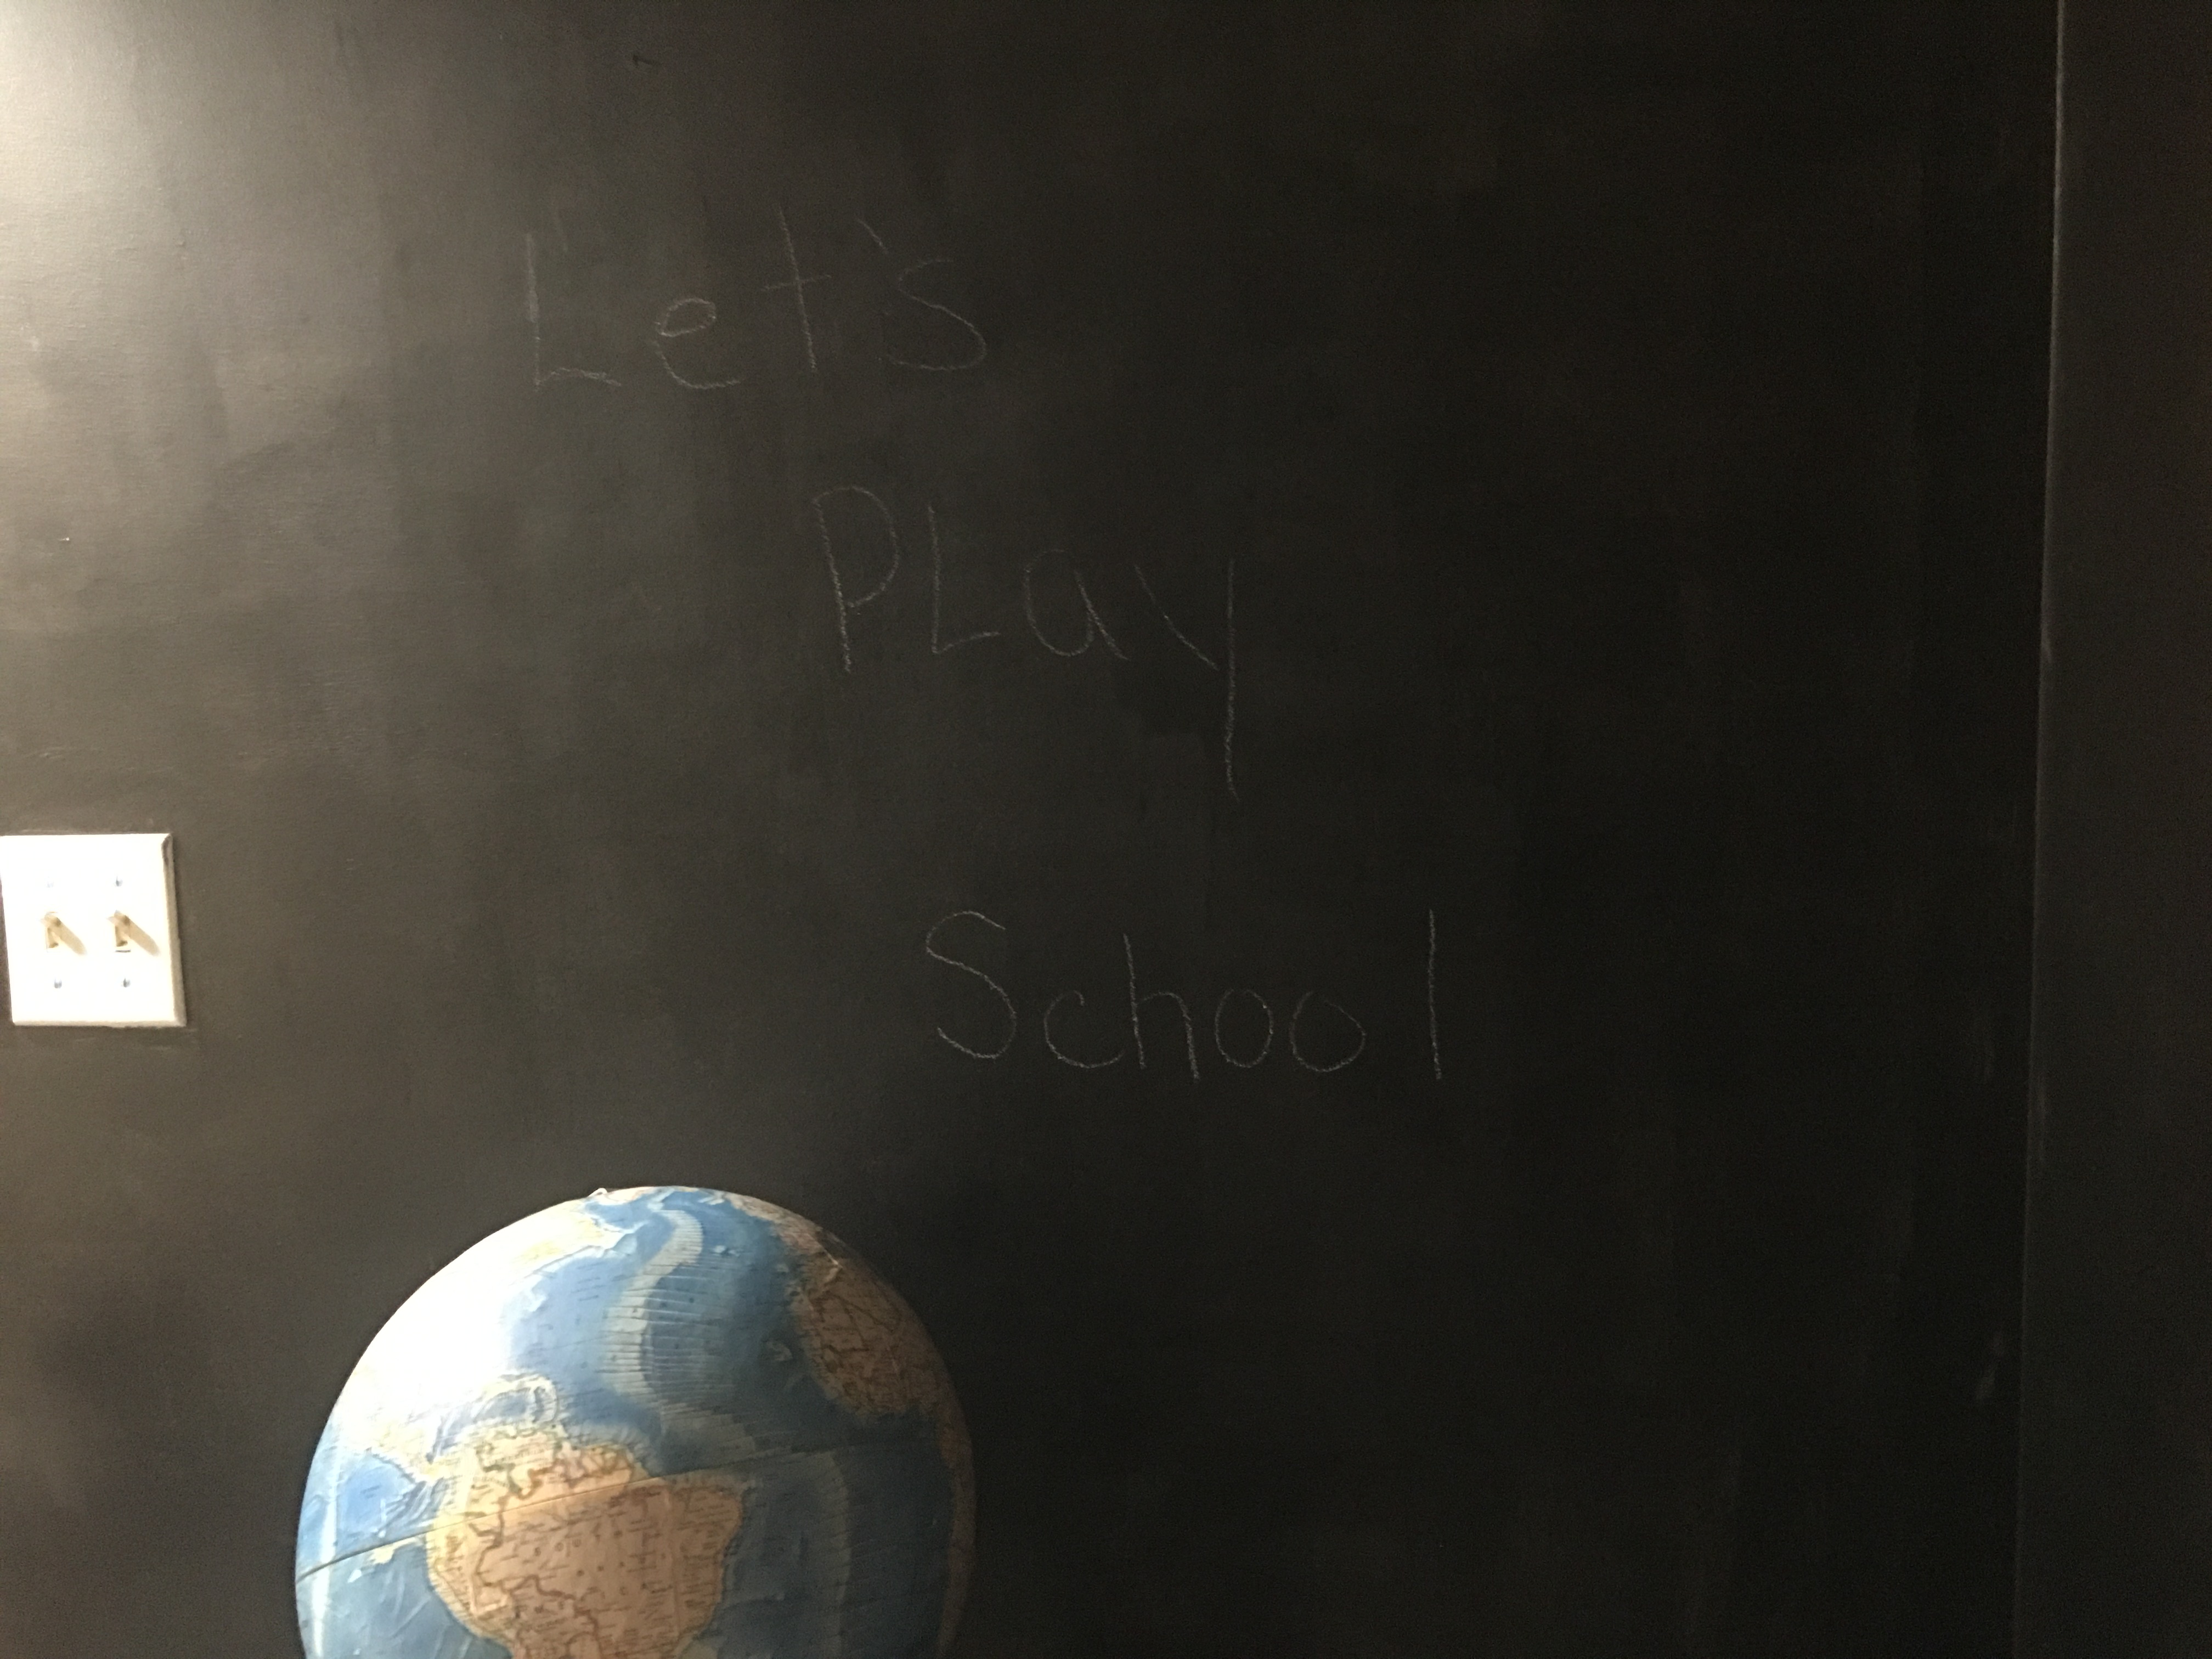
We have a little nook in the basement that’s pretty small. We will likely do a storage solution in it one day For now, the kids voted for mini-play school. I used Rustoleum Chalkboard Paint, a table, stools, and a globe we already had to set it up. The only cost here was the paint but it’s a fun new way to use an unused space.
Step 4: Use Your Existing Storage
We already had these six-cube storage organizers (@Amazon) in weathered gray. I also had a set of square wicker baskets @Amazon that go inside. We made a pact to only keep toys that would fit inside these baskets. We used what we already have to organize each basket by theme. A couple of their favorite larger items sit on top and the rest of the floor space is now open to play.
$100 2-Day Basement Playroom Make-Over Before and After Photos
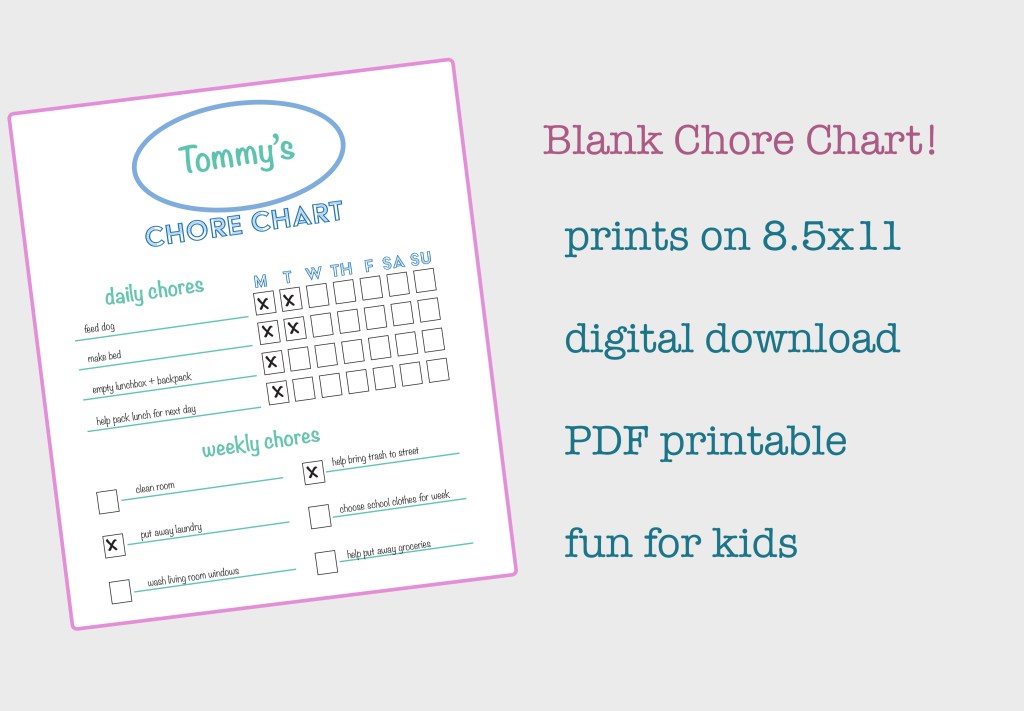
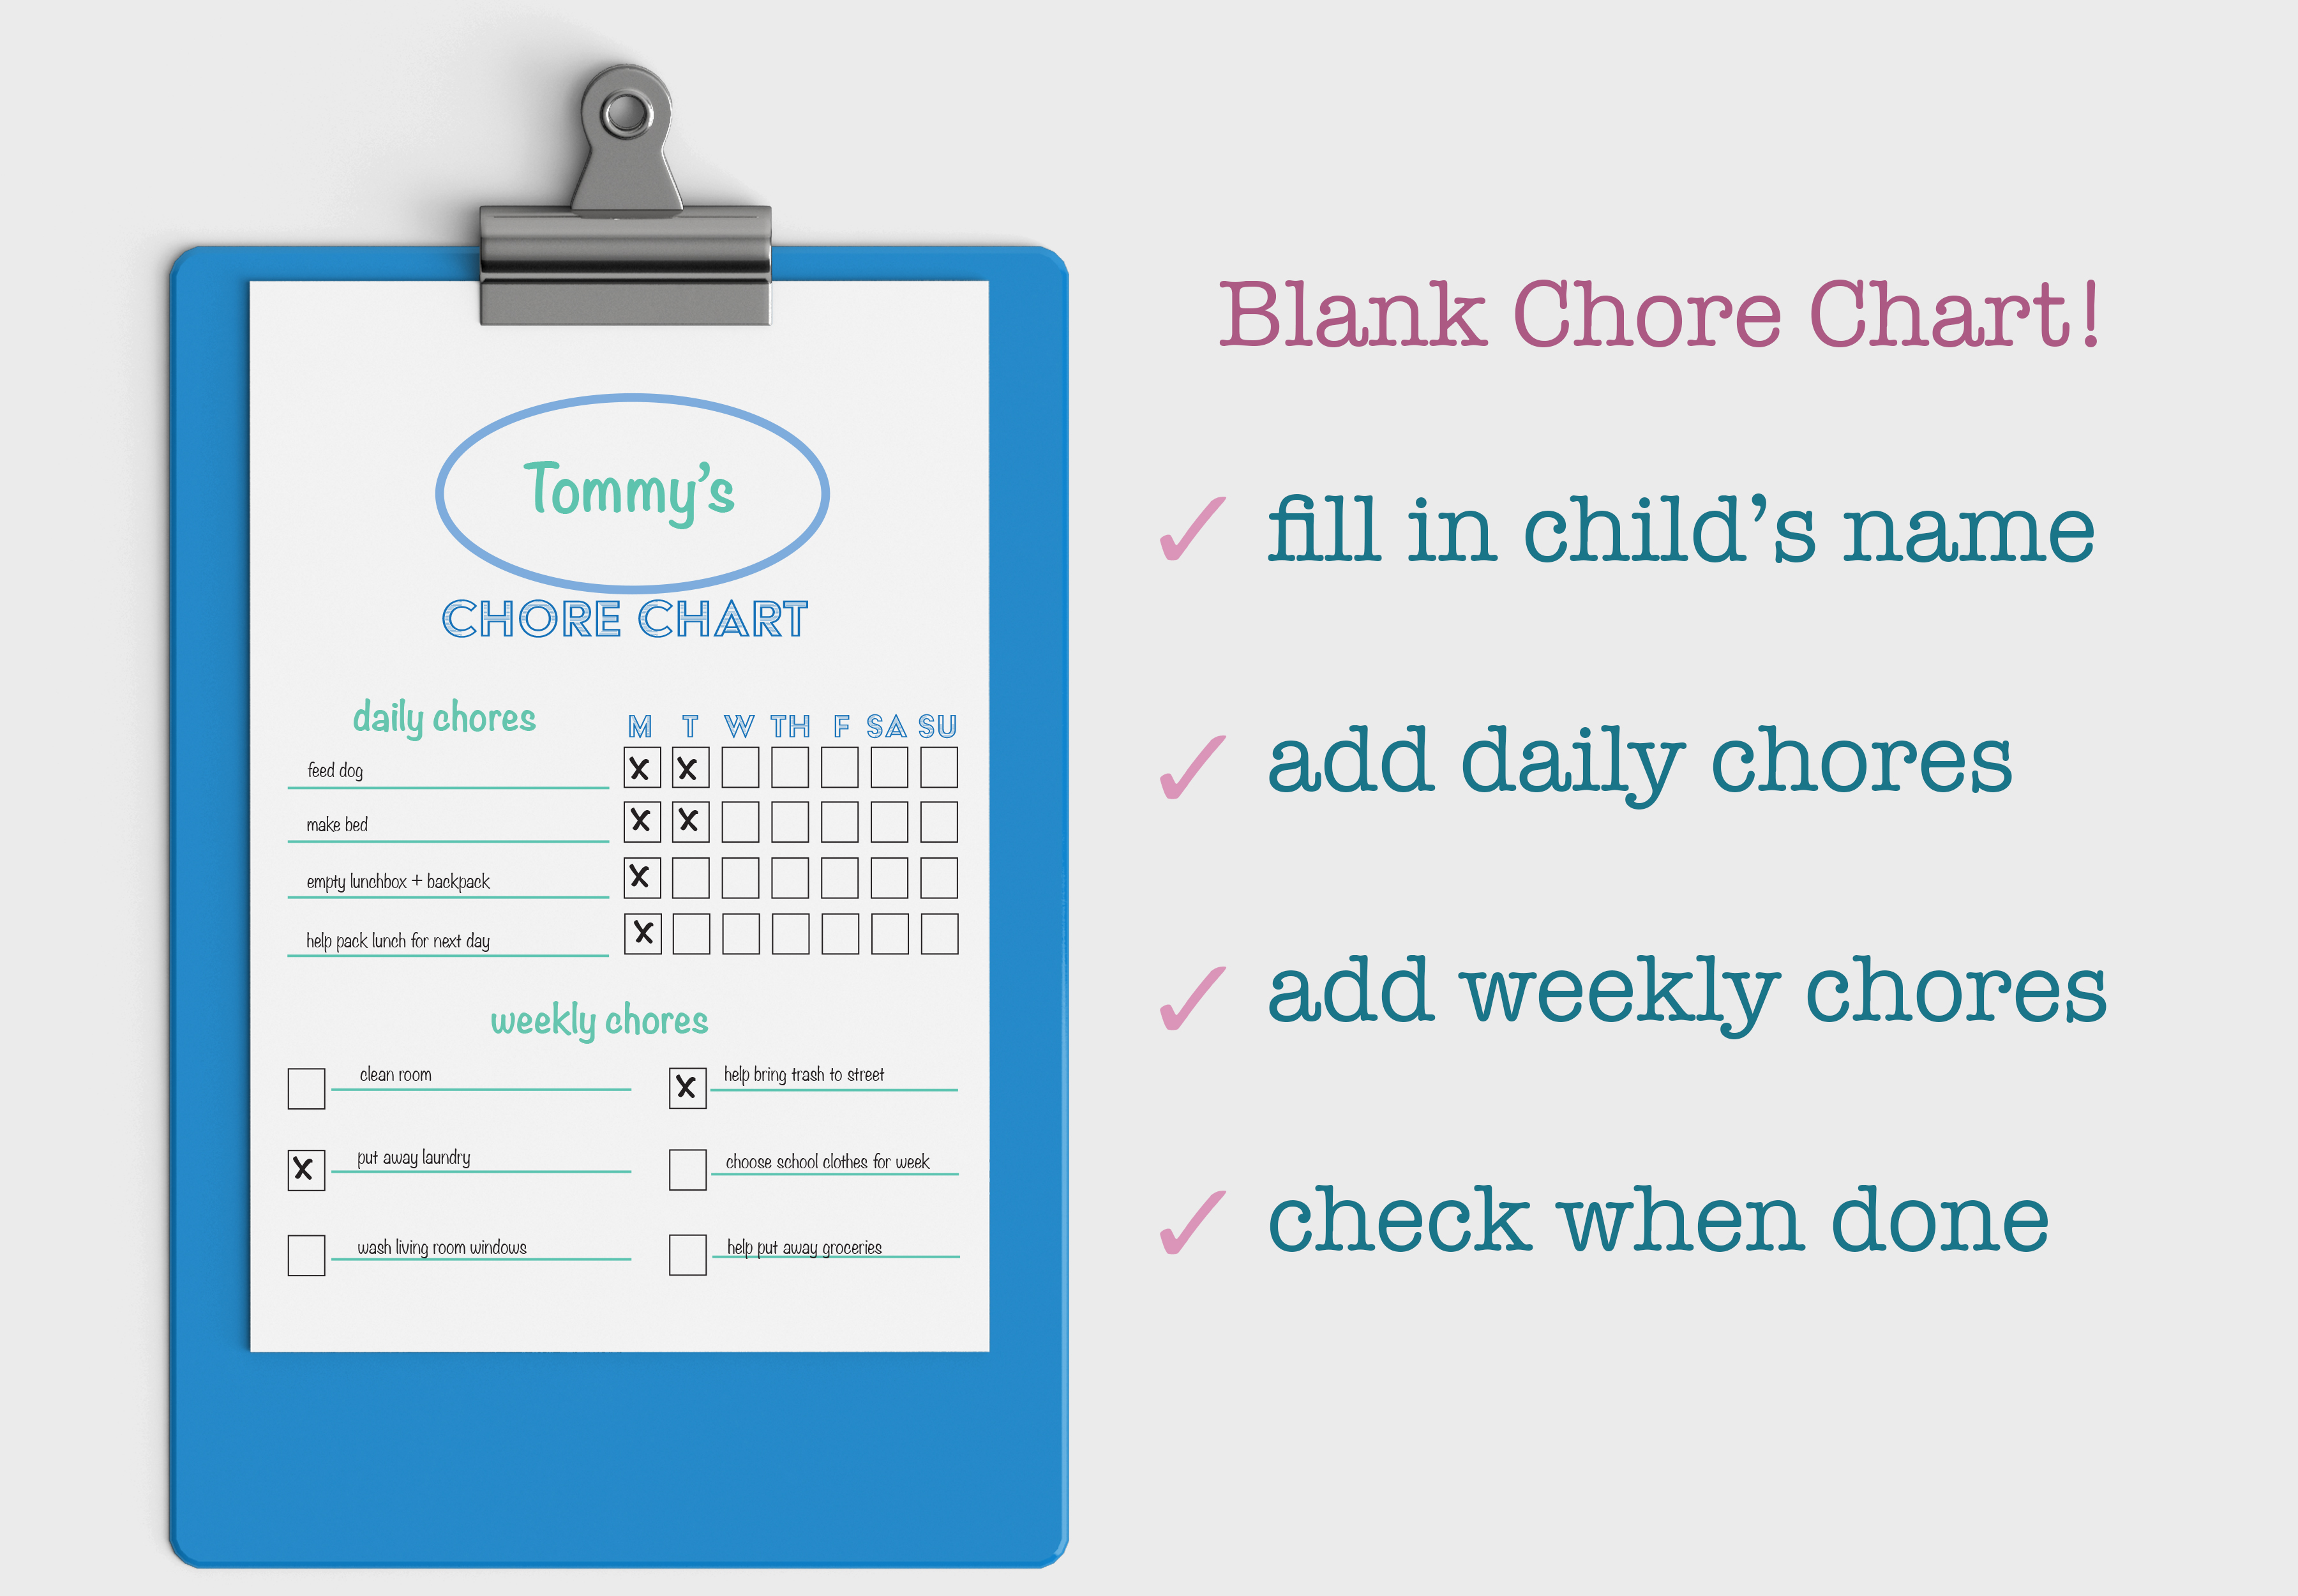
While we all know kids are more than capable of turning your house upside down, it’s important to remember all they are capable of as well. With guidance and grace kids can become great household helpers. To help give you a starting point, I’ve grouped different chores according to age group. While some of these chores are done daily some may happen once a week or once a month. Chores are a great opportunity to give kids a job, something to do when they need a little redirection, and believe it or not when they need some quality time with you. Even if you end up re-wiping a table or folding, it’s the point that they are learning important life skills, and the more they practice the better they will get.
**One big disclaimer with this one is that every family and kid is different. If you’re looking to get your kids more involved in keeping your home clean, I’ve rounded up a few basic chores according to age group. Every child has different abilities and every parent has different comfort levels so please adapt this to fit your own family.**
Chores for 2-3+
Put clothes in hamper
Throws out their garbage
Bring cups and snacks to sink or counter
Tidies up space, crayons back in box, workstation pick up
Chores for 4-5+
Declutter and take part in donating toys they don’t play with
Clear dishes
Put away toys in appropriate places
Put laundry away in appropriate drawers
Empty lunchbox after school
Wipe surfaces
Make bed
Pick up sticks
Rake leaves
Choose outfits for next day or week
Chores for 6-8+
Fold laundry
Hang laundry
Load dishwasher
Feed pets
Wash windows
Wash baseboards
Disinfect screens and handheld devices
Make breakfast (cereal, toast, fruit, yogurt)
Checks backpack for library books, homework, projects, sporting equipment
Chores for 9-11+
9-11+
Learn to complete laundry cycle
Empty dishes
Prep lunches
Learn to prepare meals, oven and stove basics
Pack snacks and water for sporting events
Vacuum
Take out trash
Snow shovel
Helps manage calendar and to-do lists
Cleans up after pets
Puts away groceries
Kid Cleaning Ideas by Age – Kid Cleaning Hacks / Kid Chores by Age @madebykidsco #madebykidsco #chorechart
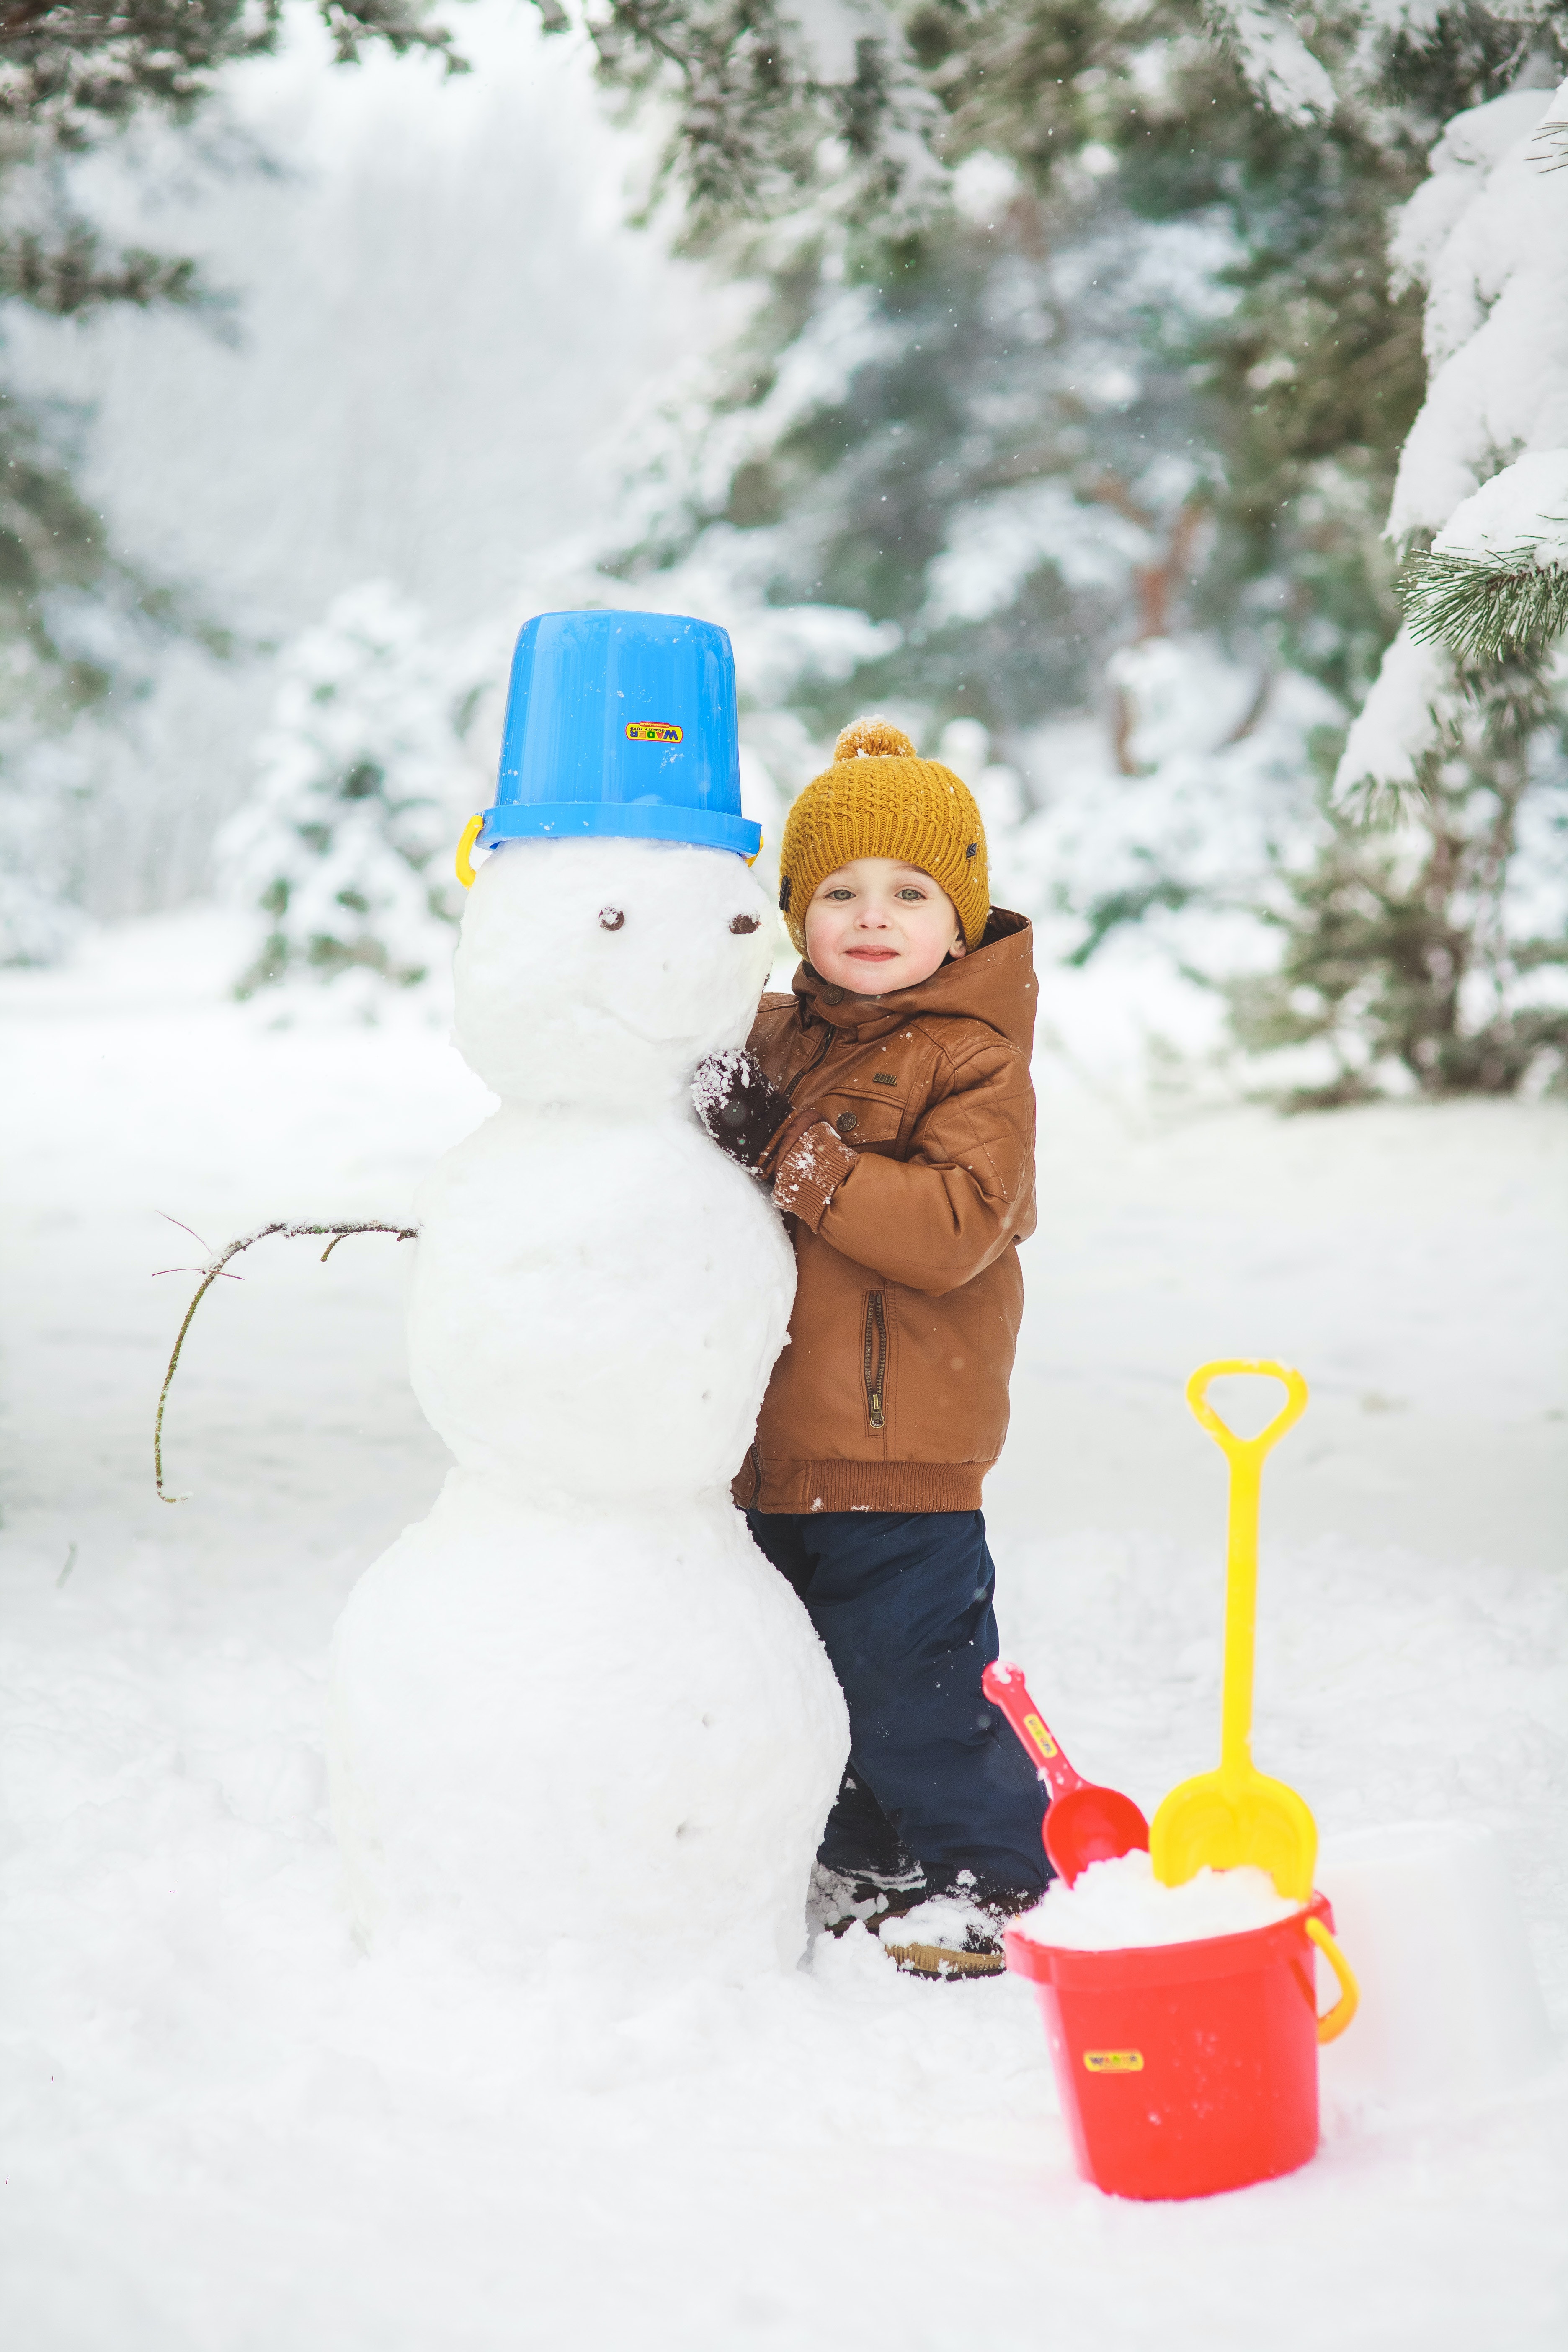
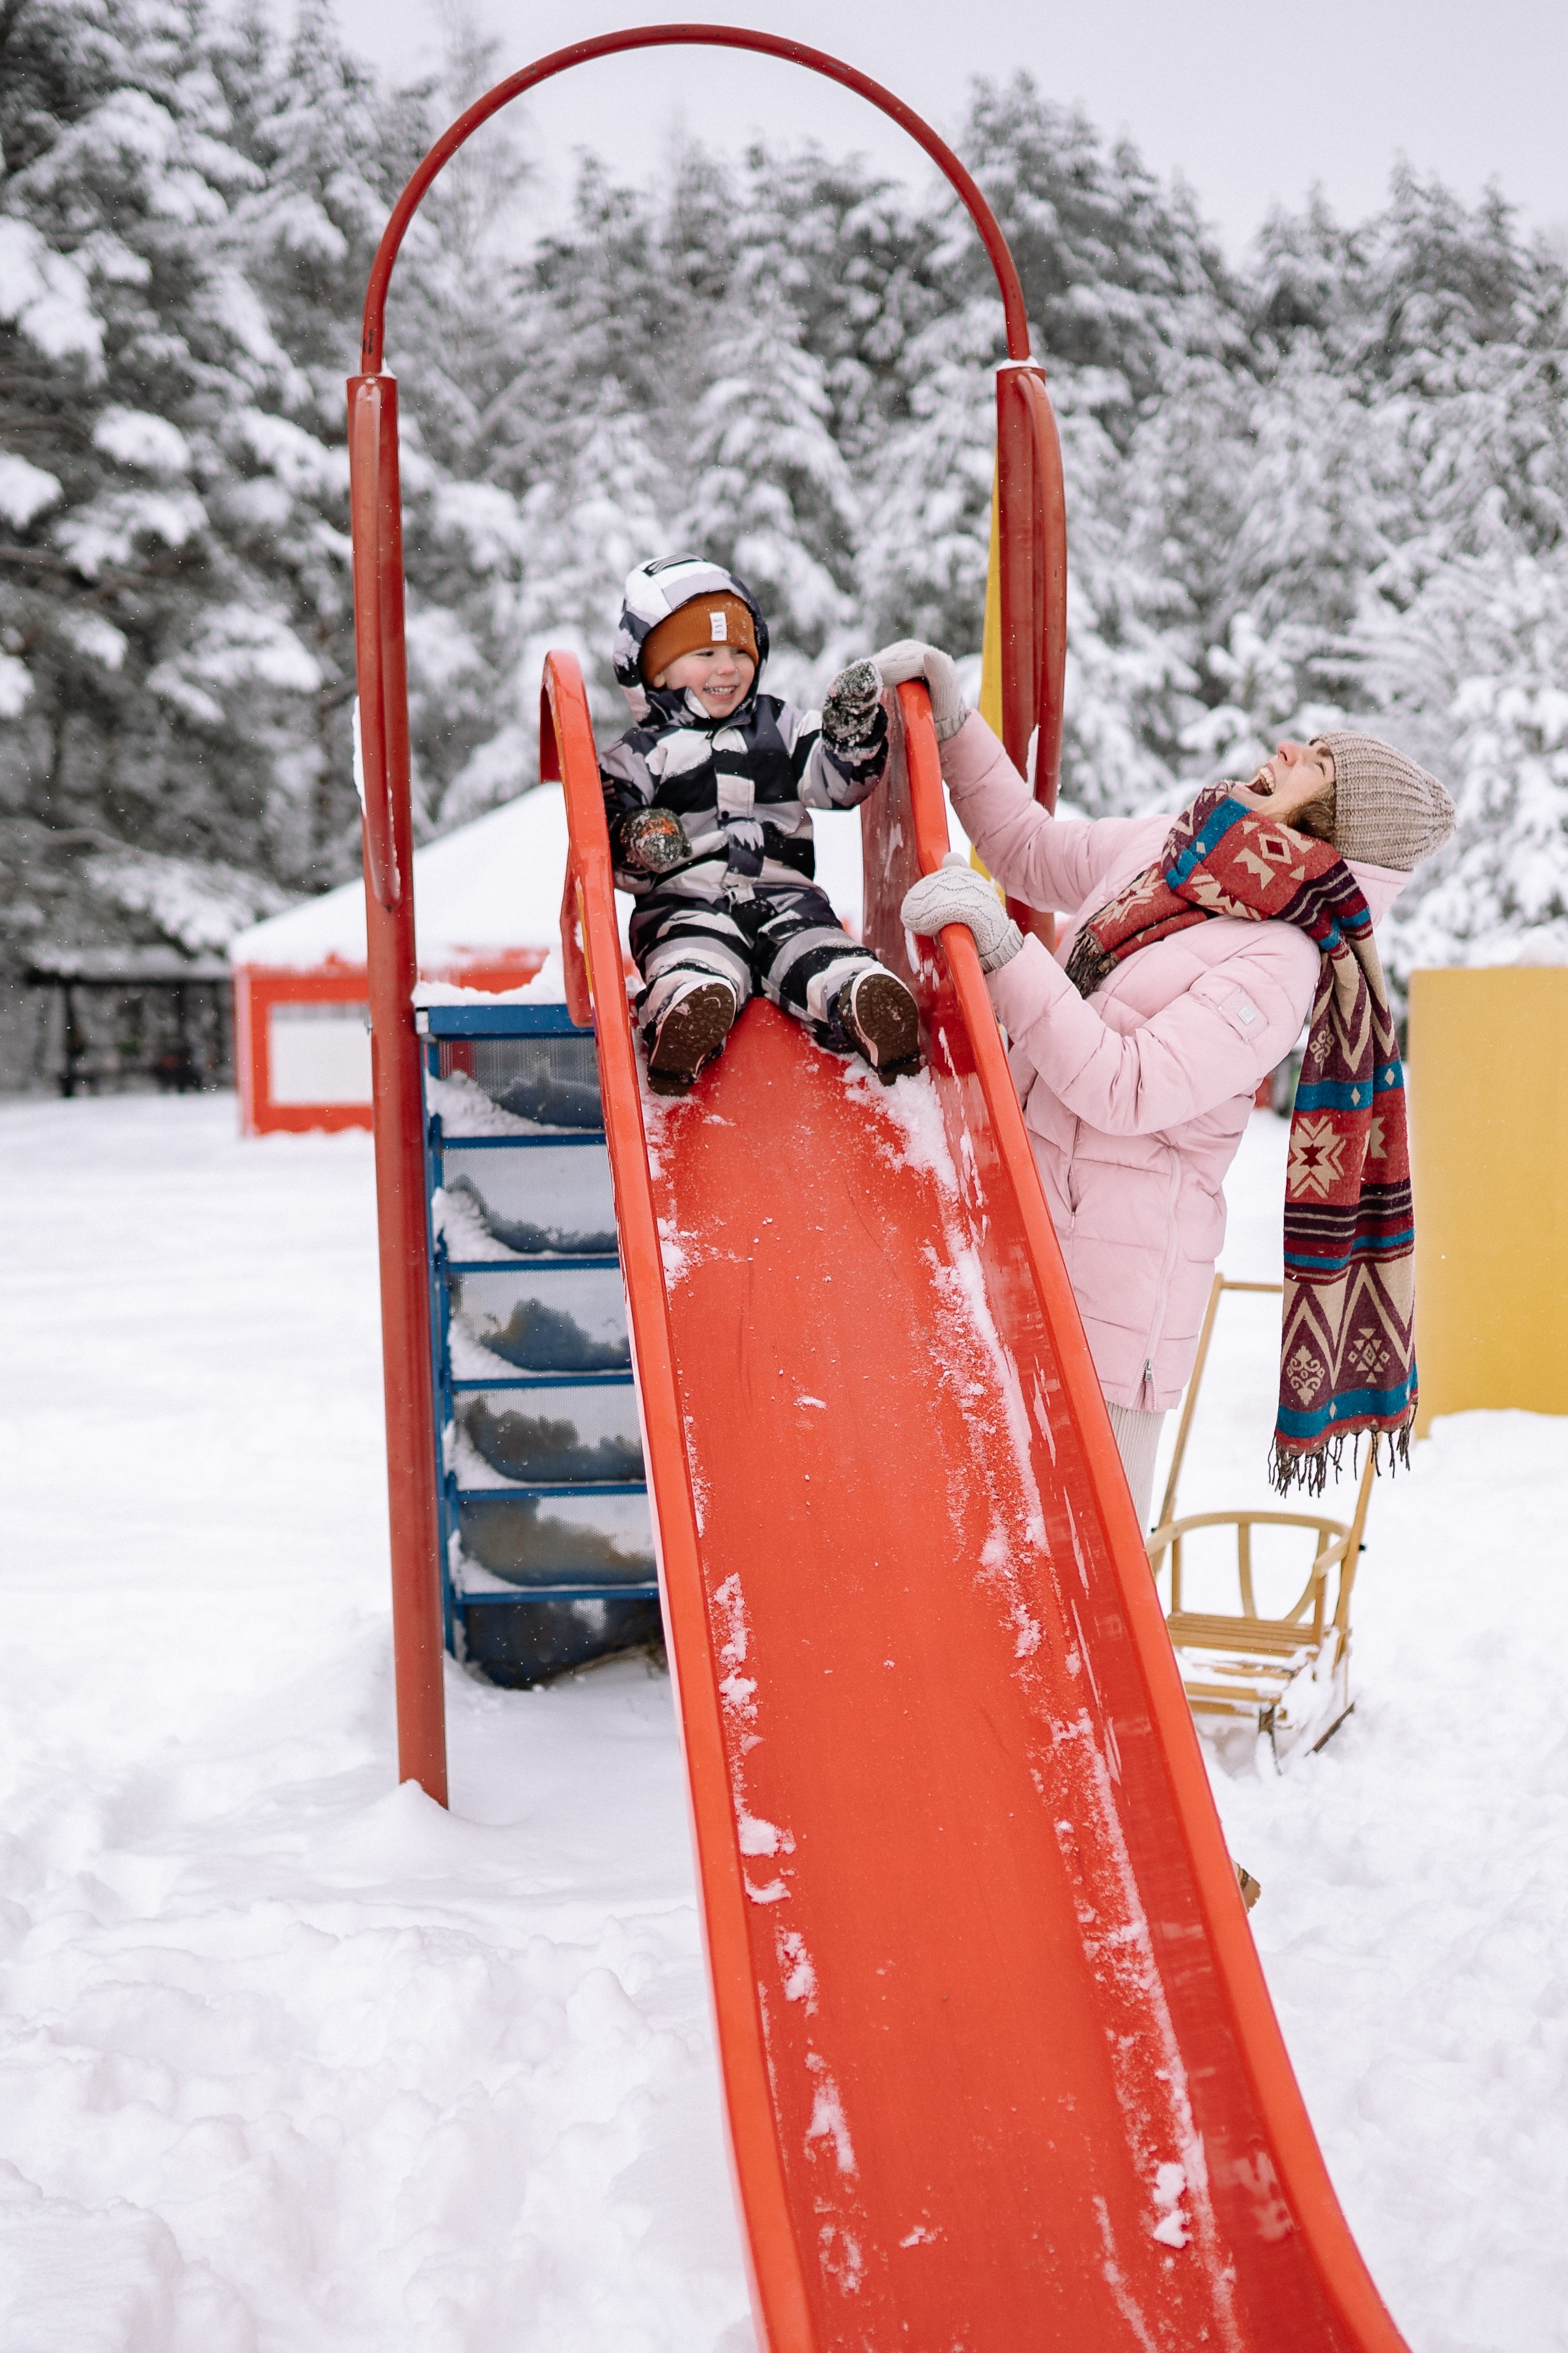
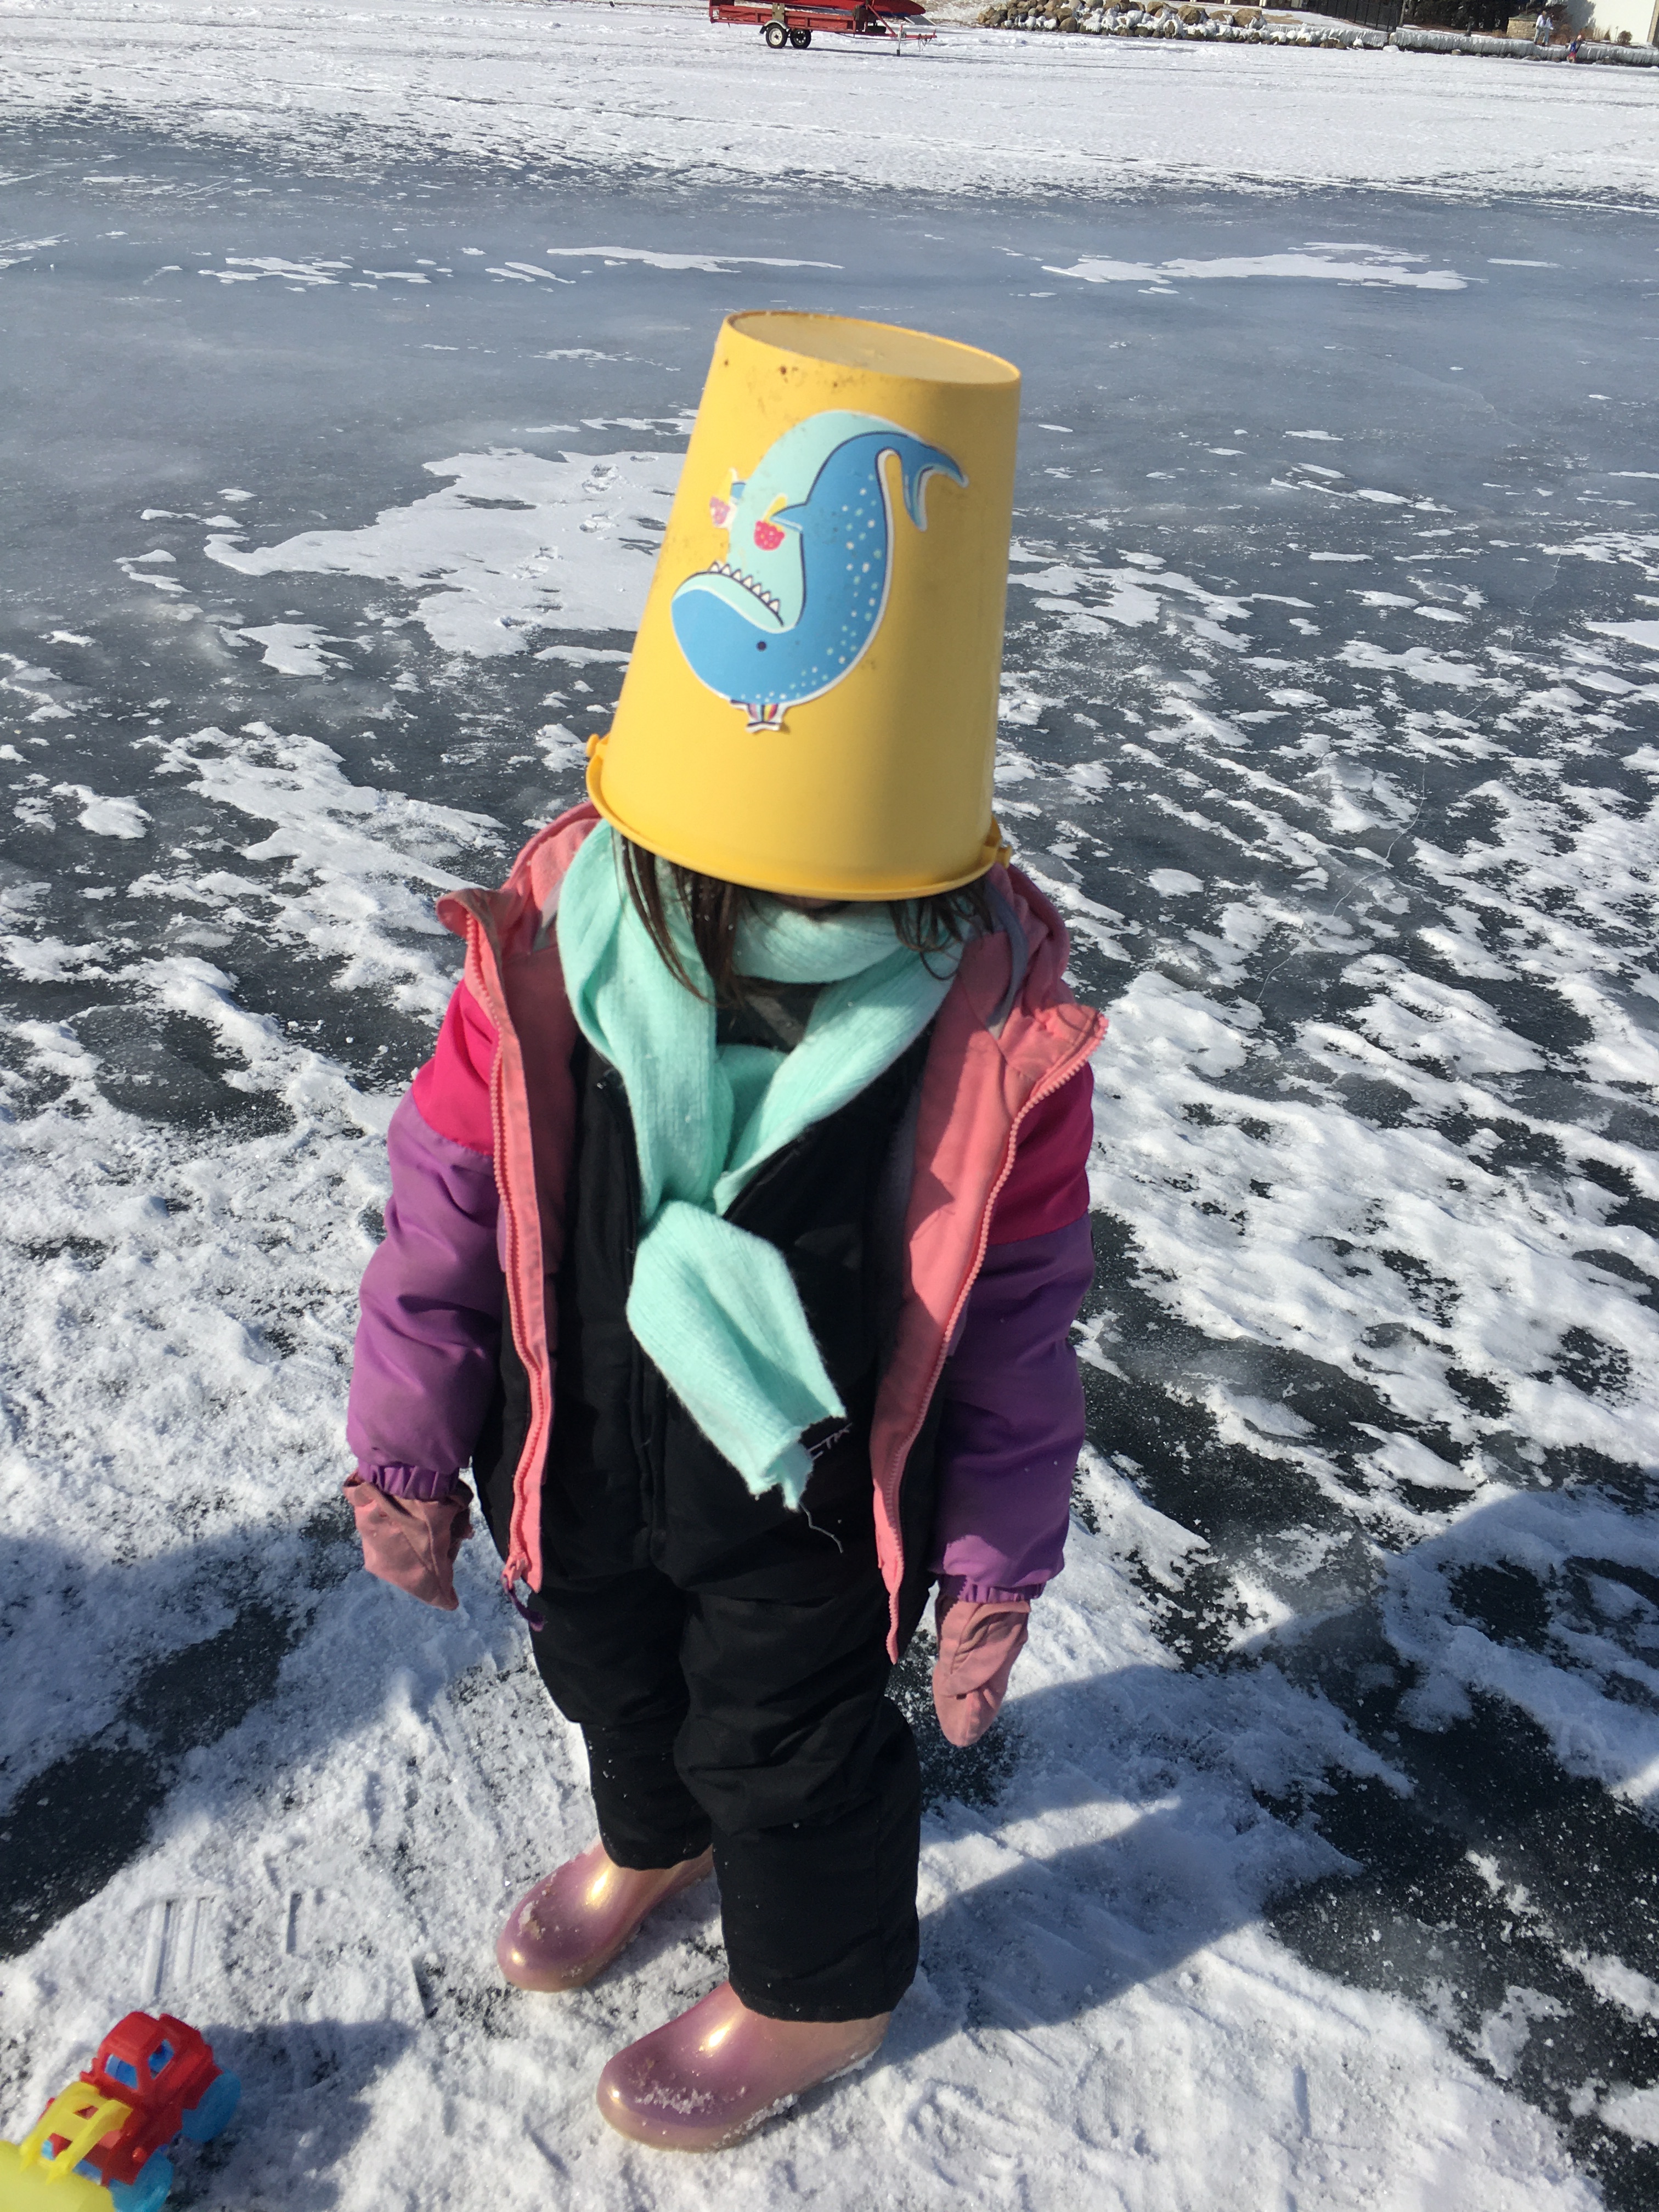
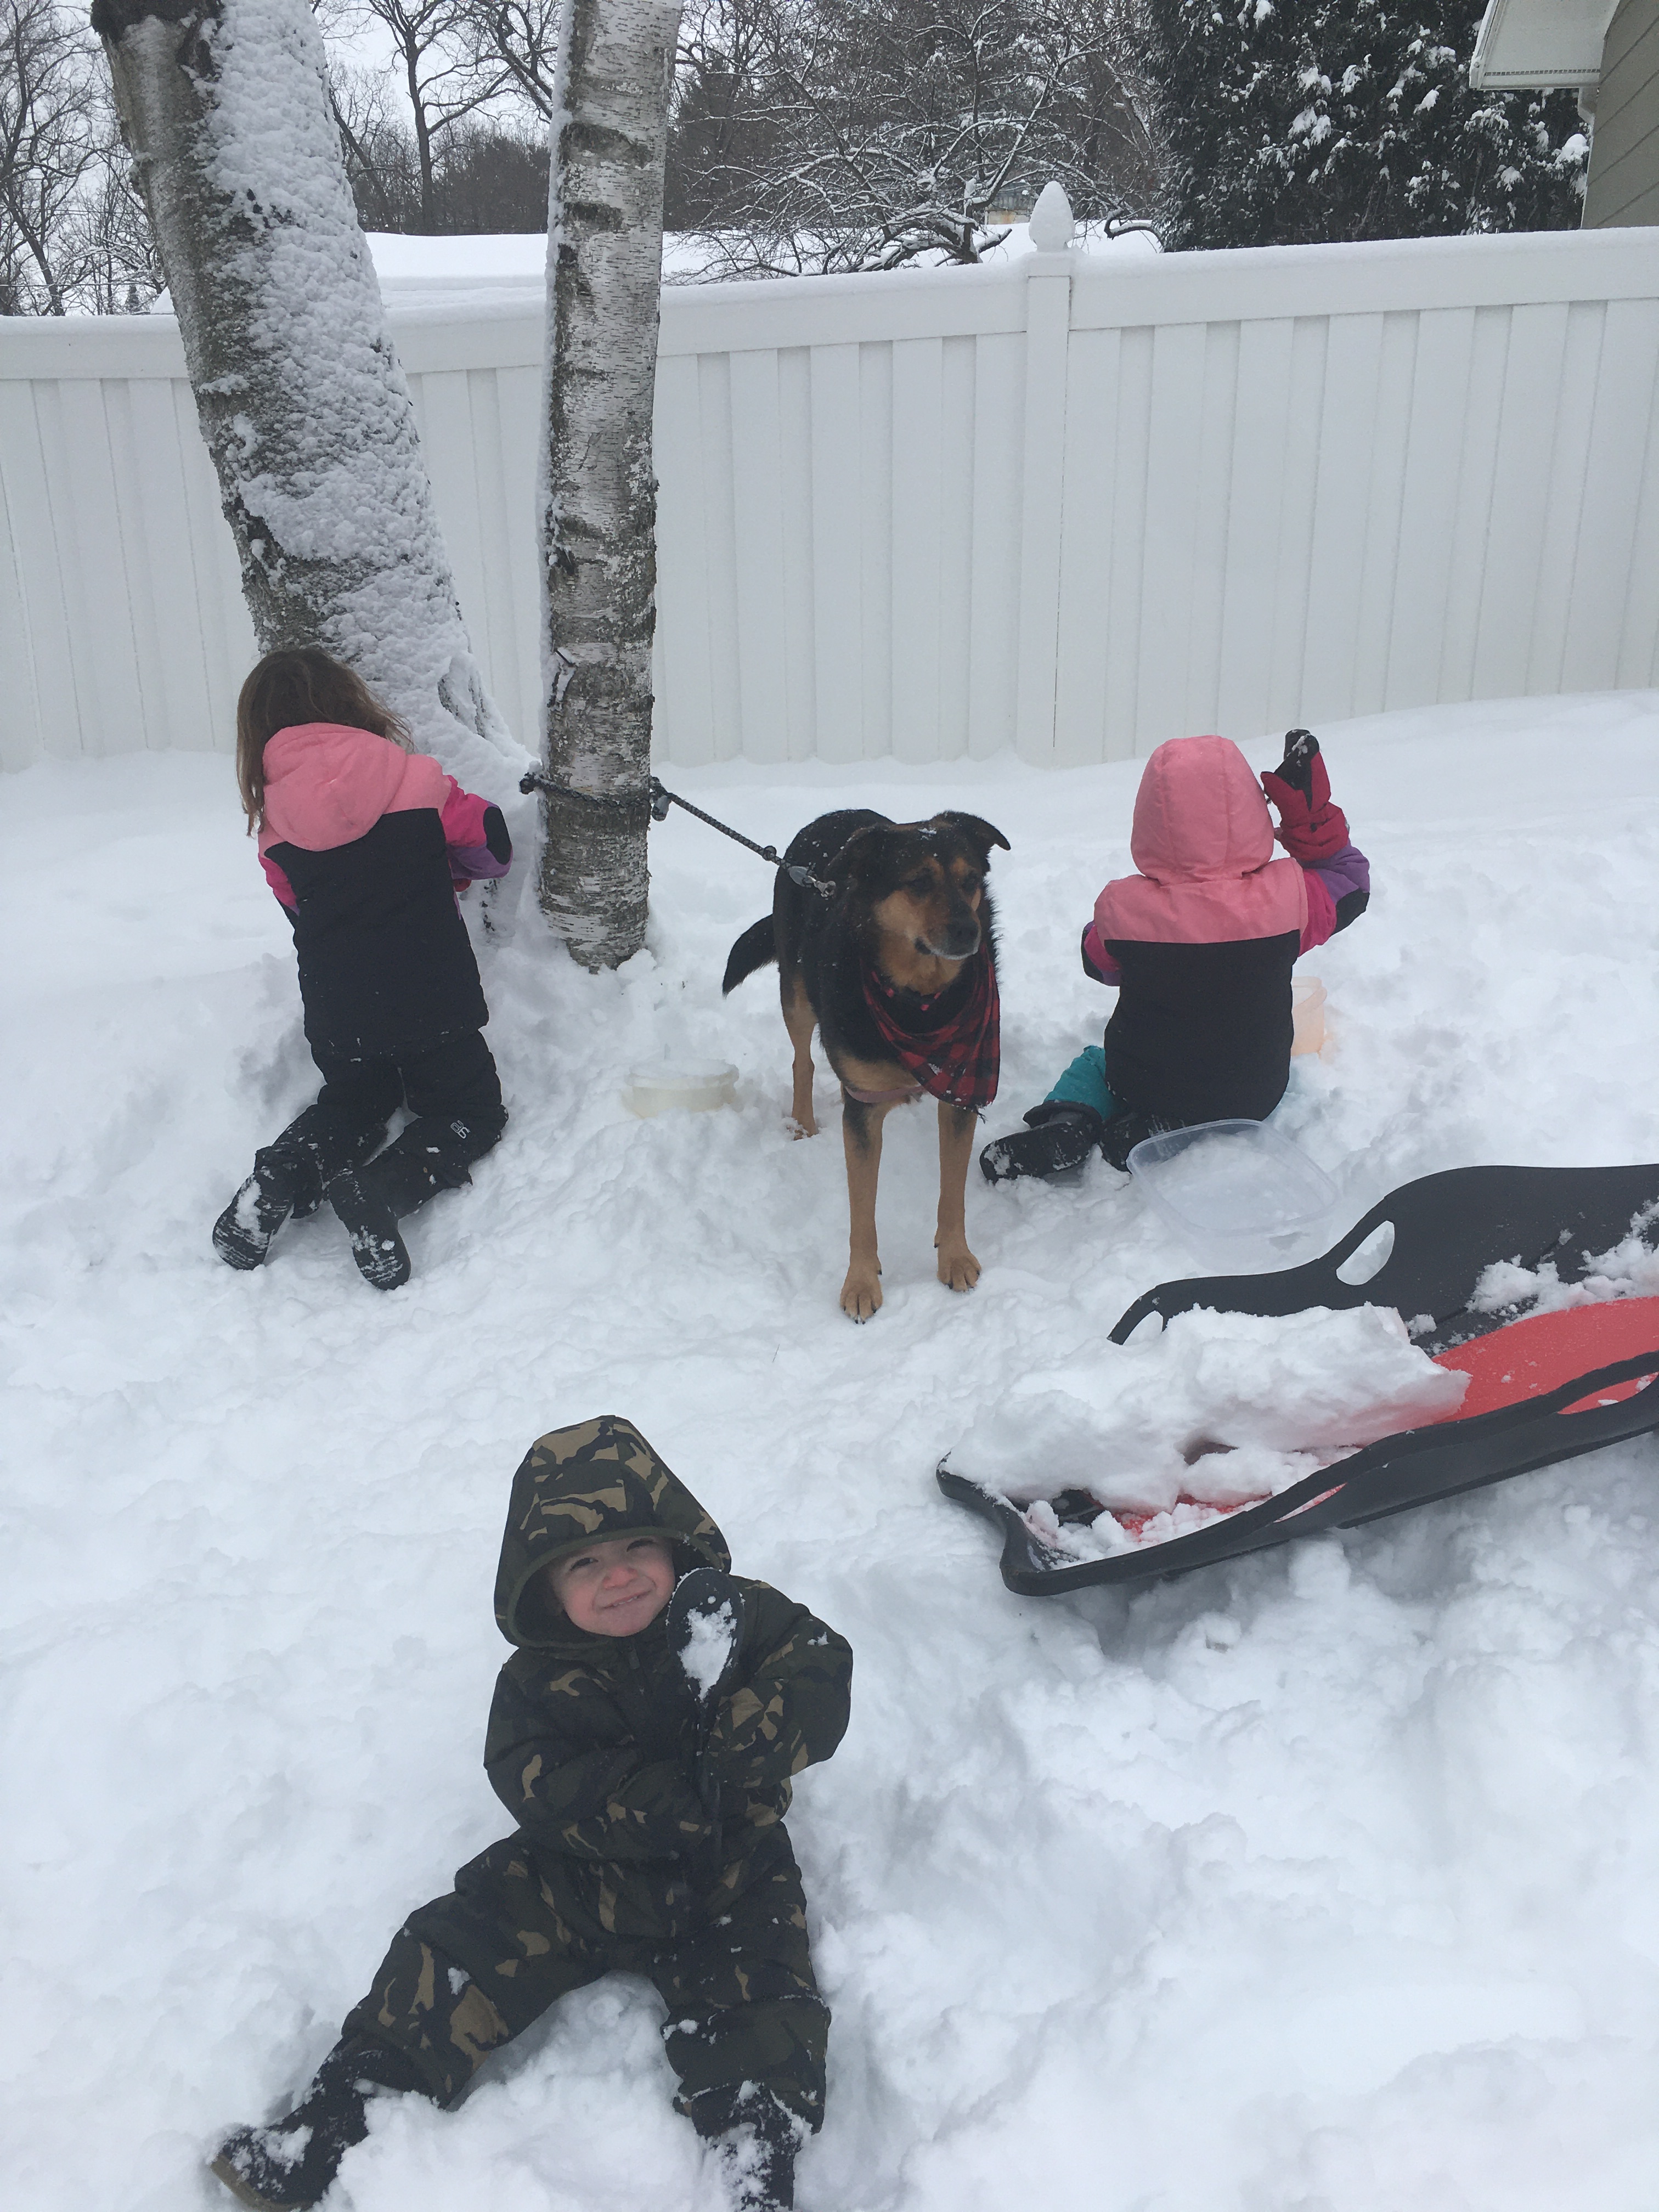
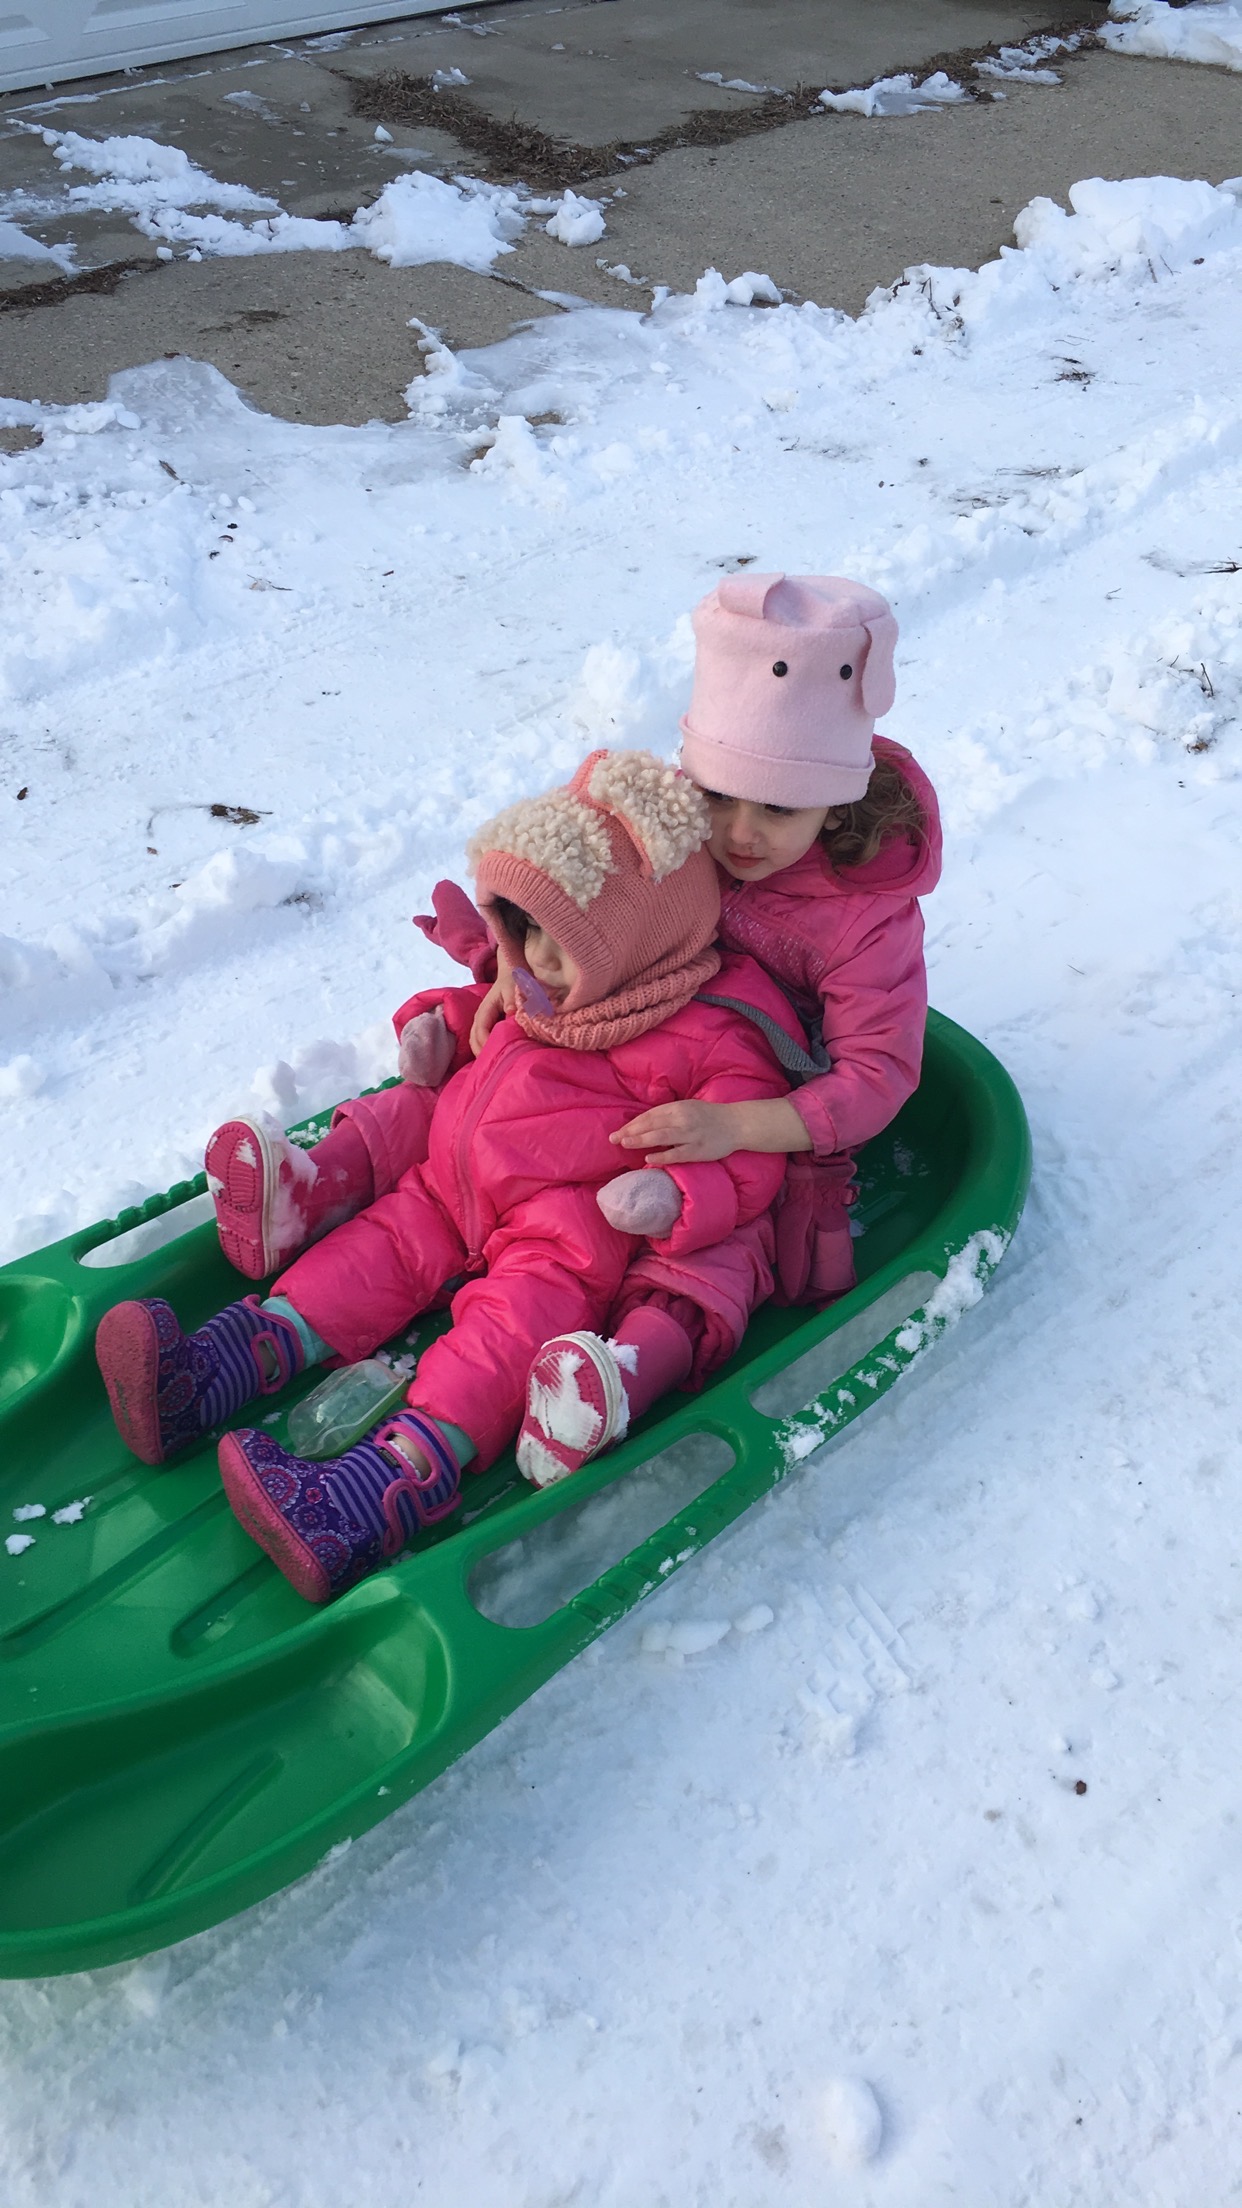
There’s so much more to snow than just making a snowman. While that’s on our list below, I’ve also rounded up some creative snow play ideas for those seemingly endless winter days. From snow kitchens to painting snow, here’s our round-up of some of the best snow play ideas for kids. Happy snow playing from Made by Kids Co!
SNOW PLAY IDEAS FOR KIDS
Make a snowman
Make a snow coffee shop
Create a snow kitchen
Use sand toys to play in the slow
Go sledding
Go snow tubing
Go to the park in the snow
Paint the snow
Color the snow with food coloring
Take a snow hike
Have a mini photoshoot
Have a campfire in the snow
Make snow ice cream
Open a pretend snow restaurant using plastic cups and plates
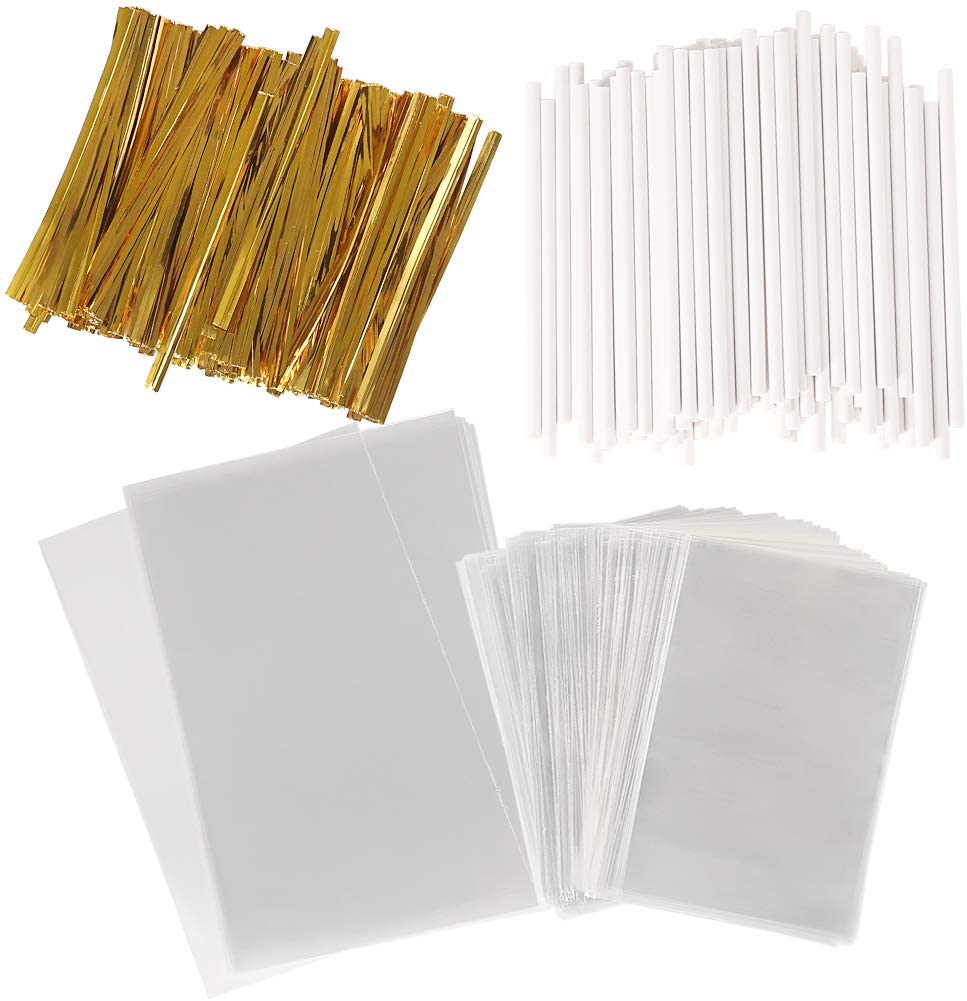
This chocolate covered Peeps recipe is super easy and fun for kids! Using only 3 ingredients, you can create these Easter Peeps suckers in under 30 minutes. You’ll only need Peeps, sprinkles, and white chocolate to melt. Insert a stick, wrap them in party treat bags and enjoy. These chocolate covered Peeps are great for Easter baskets, gifts, and Easter centerpieces. Check out our easy how-to video on YouTube!