$100 2-Day Basement Playroom Makeover

After Christmas, it was on our agenda to go through and donate a bunch of toys the kids have outgrown or no longer play with. Our basement is a smaller space and while there’s plenty of room to watch a movie or play, there isn’t enough space for hundreds of plastic toys. When we decided to refresh our basement, we wanted to do so without spending much money and without creating more storage for toys. Instead, if the toys didn’t fit into our current storage solutions, off to the donation center they went! Check out our $100 weekend playroom makeover.

Shop the Basement Playroom Makeover

  • Behr Cotton Knit (walls) – @Behr
  • Rustoleum Chalkboard Paint (Black school walls) @Amazon
  • 6 Cube Organizer – @Amazon
  • Wicker Storage Cubes @Amazon
  • Wood Curtain Rod @Amazon
  • Velvet Trim Curtain Panel @Target

Step 1: Declutter

If you’re looking to re-organize your playroom or give do a quick playroom makeover, the best thing you can do is to declutter. Decluttering doesn’t cost you anything and you can do it as often as you’d like. While I painted and created a cute mini-playschool in this refresh, decluttering made the most impact.

Step 2: Paint

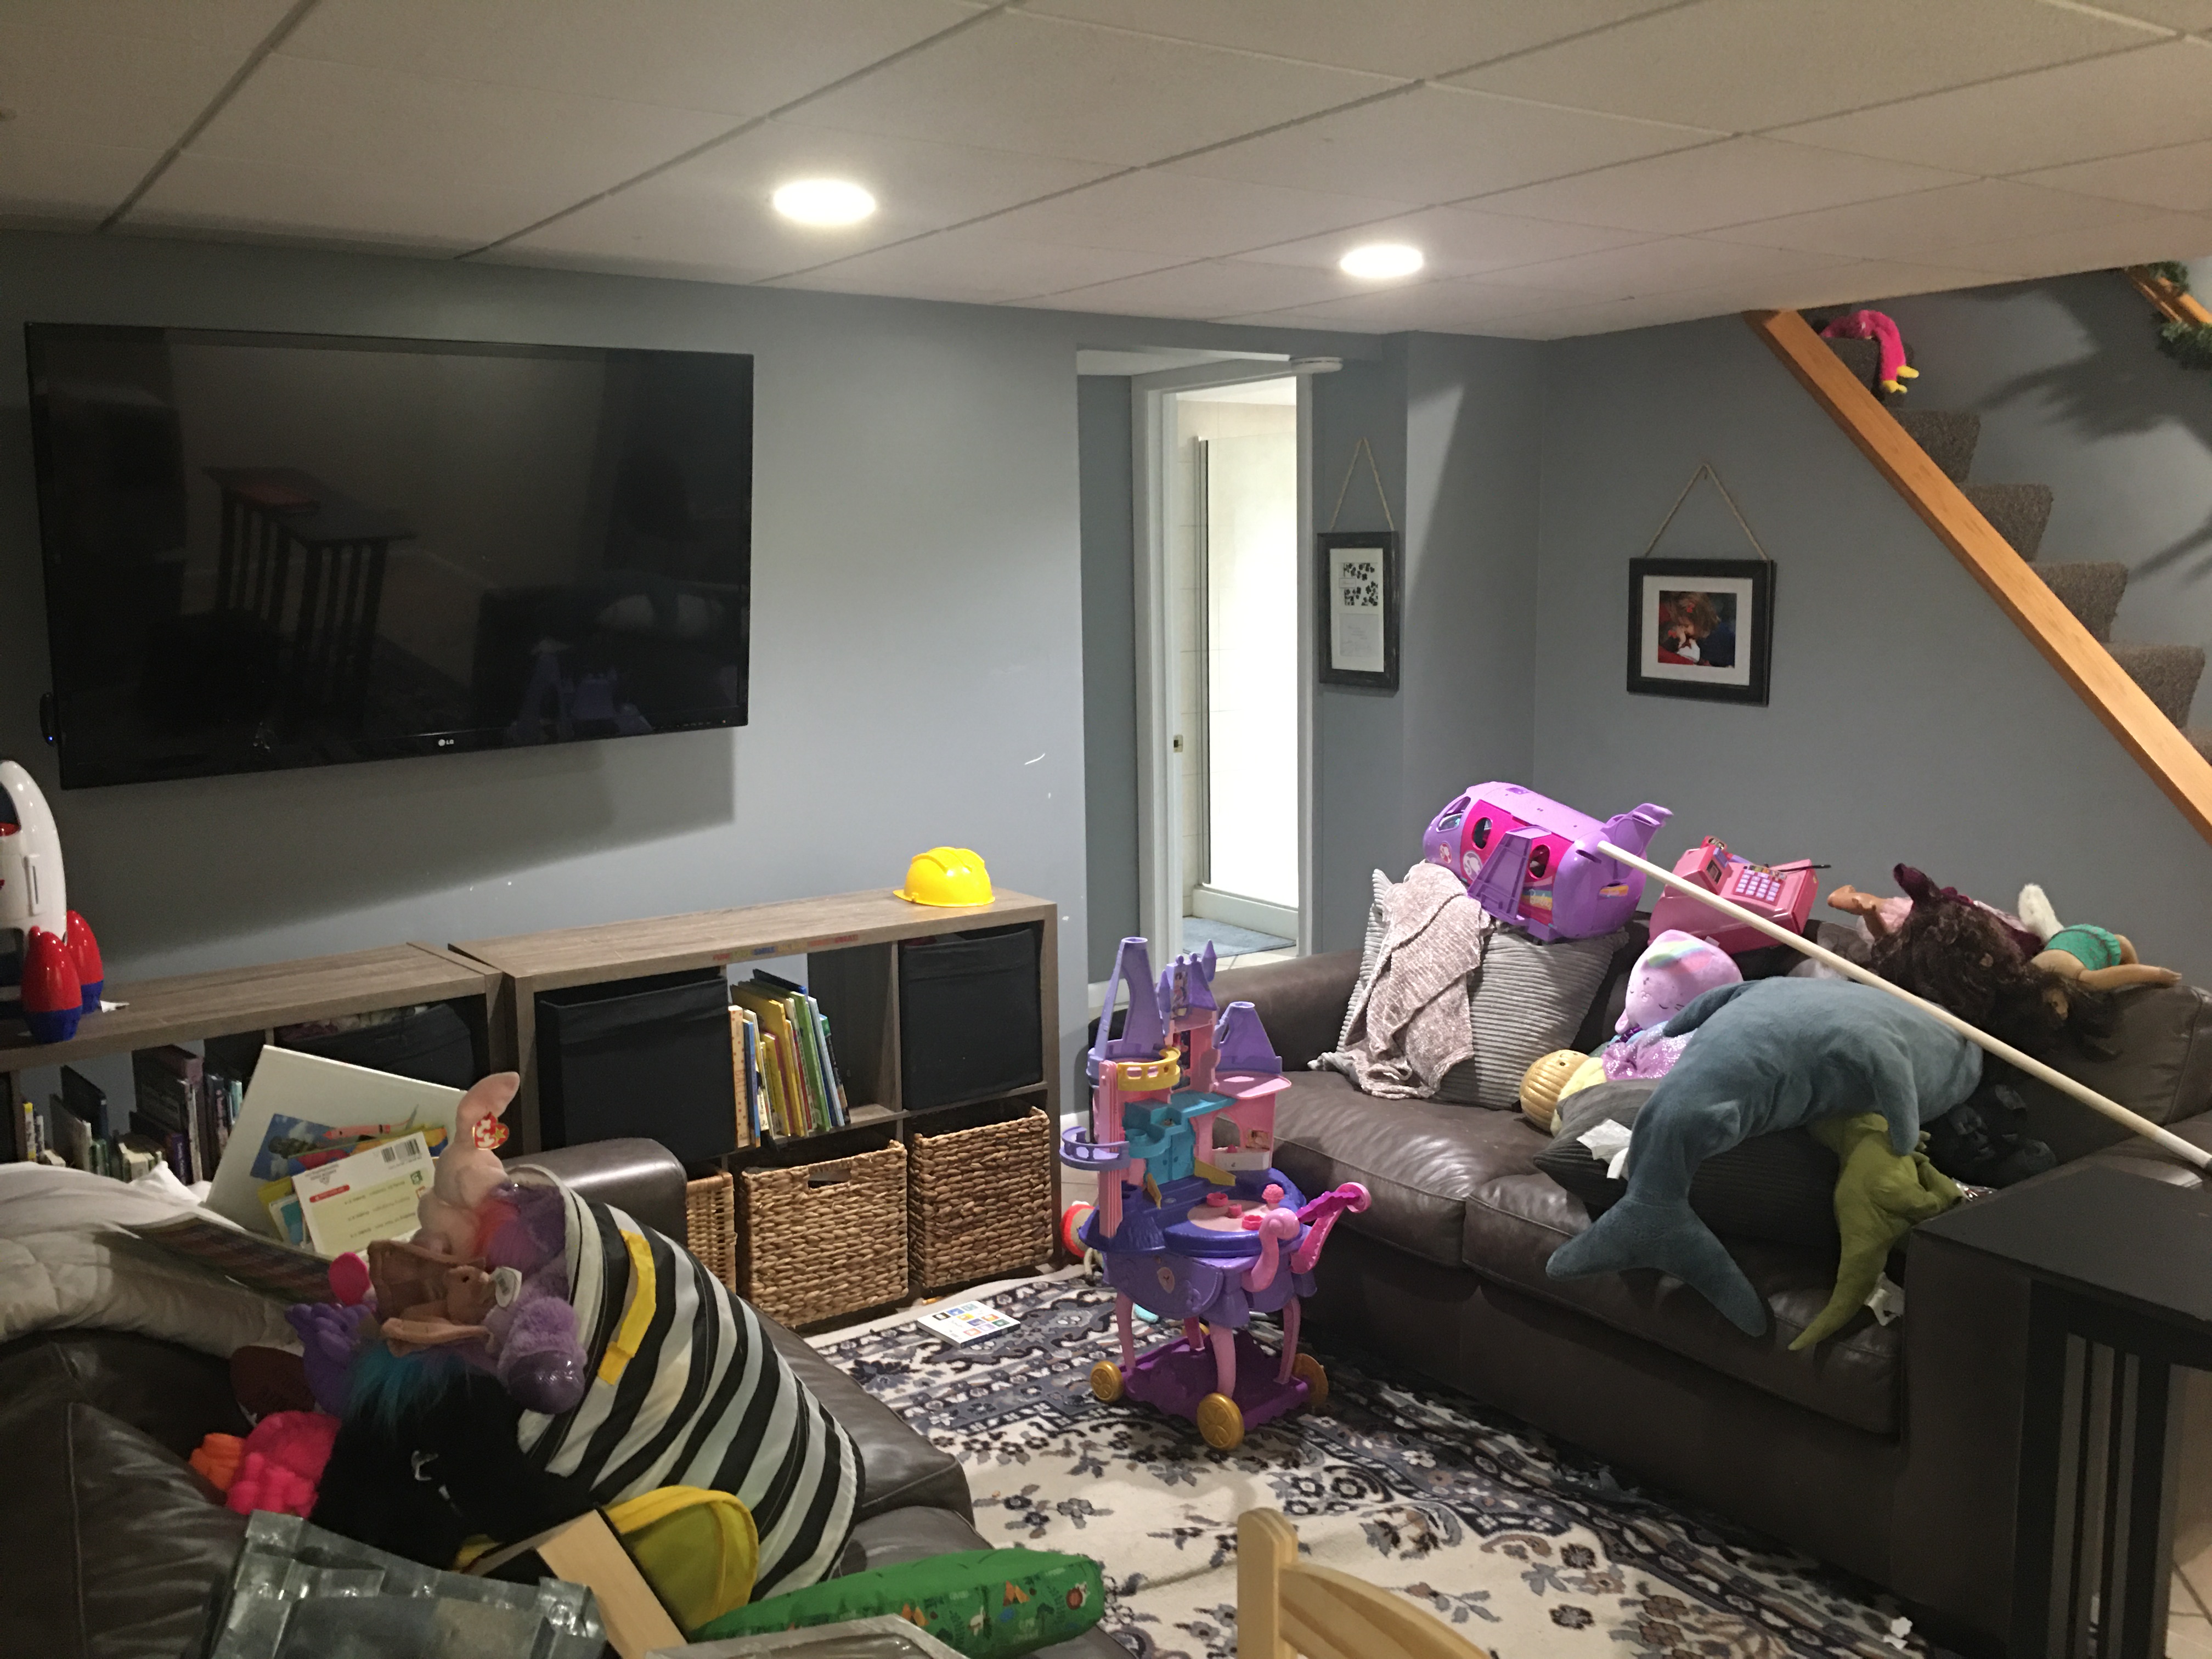
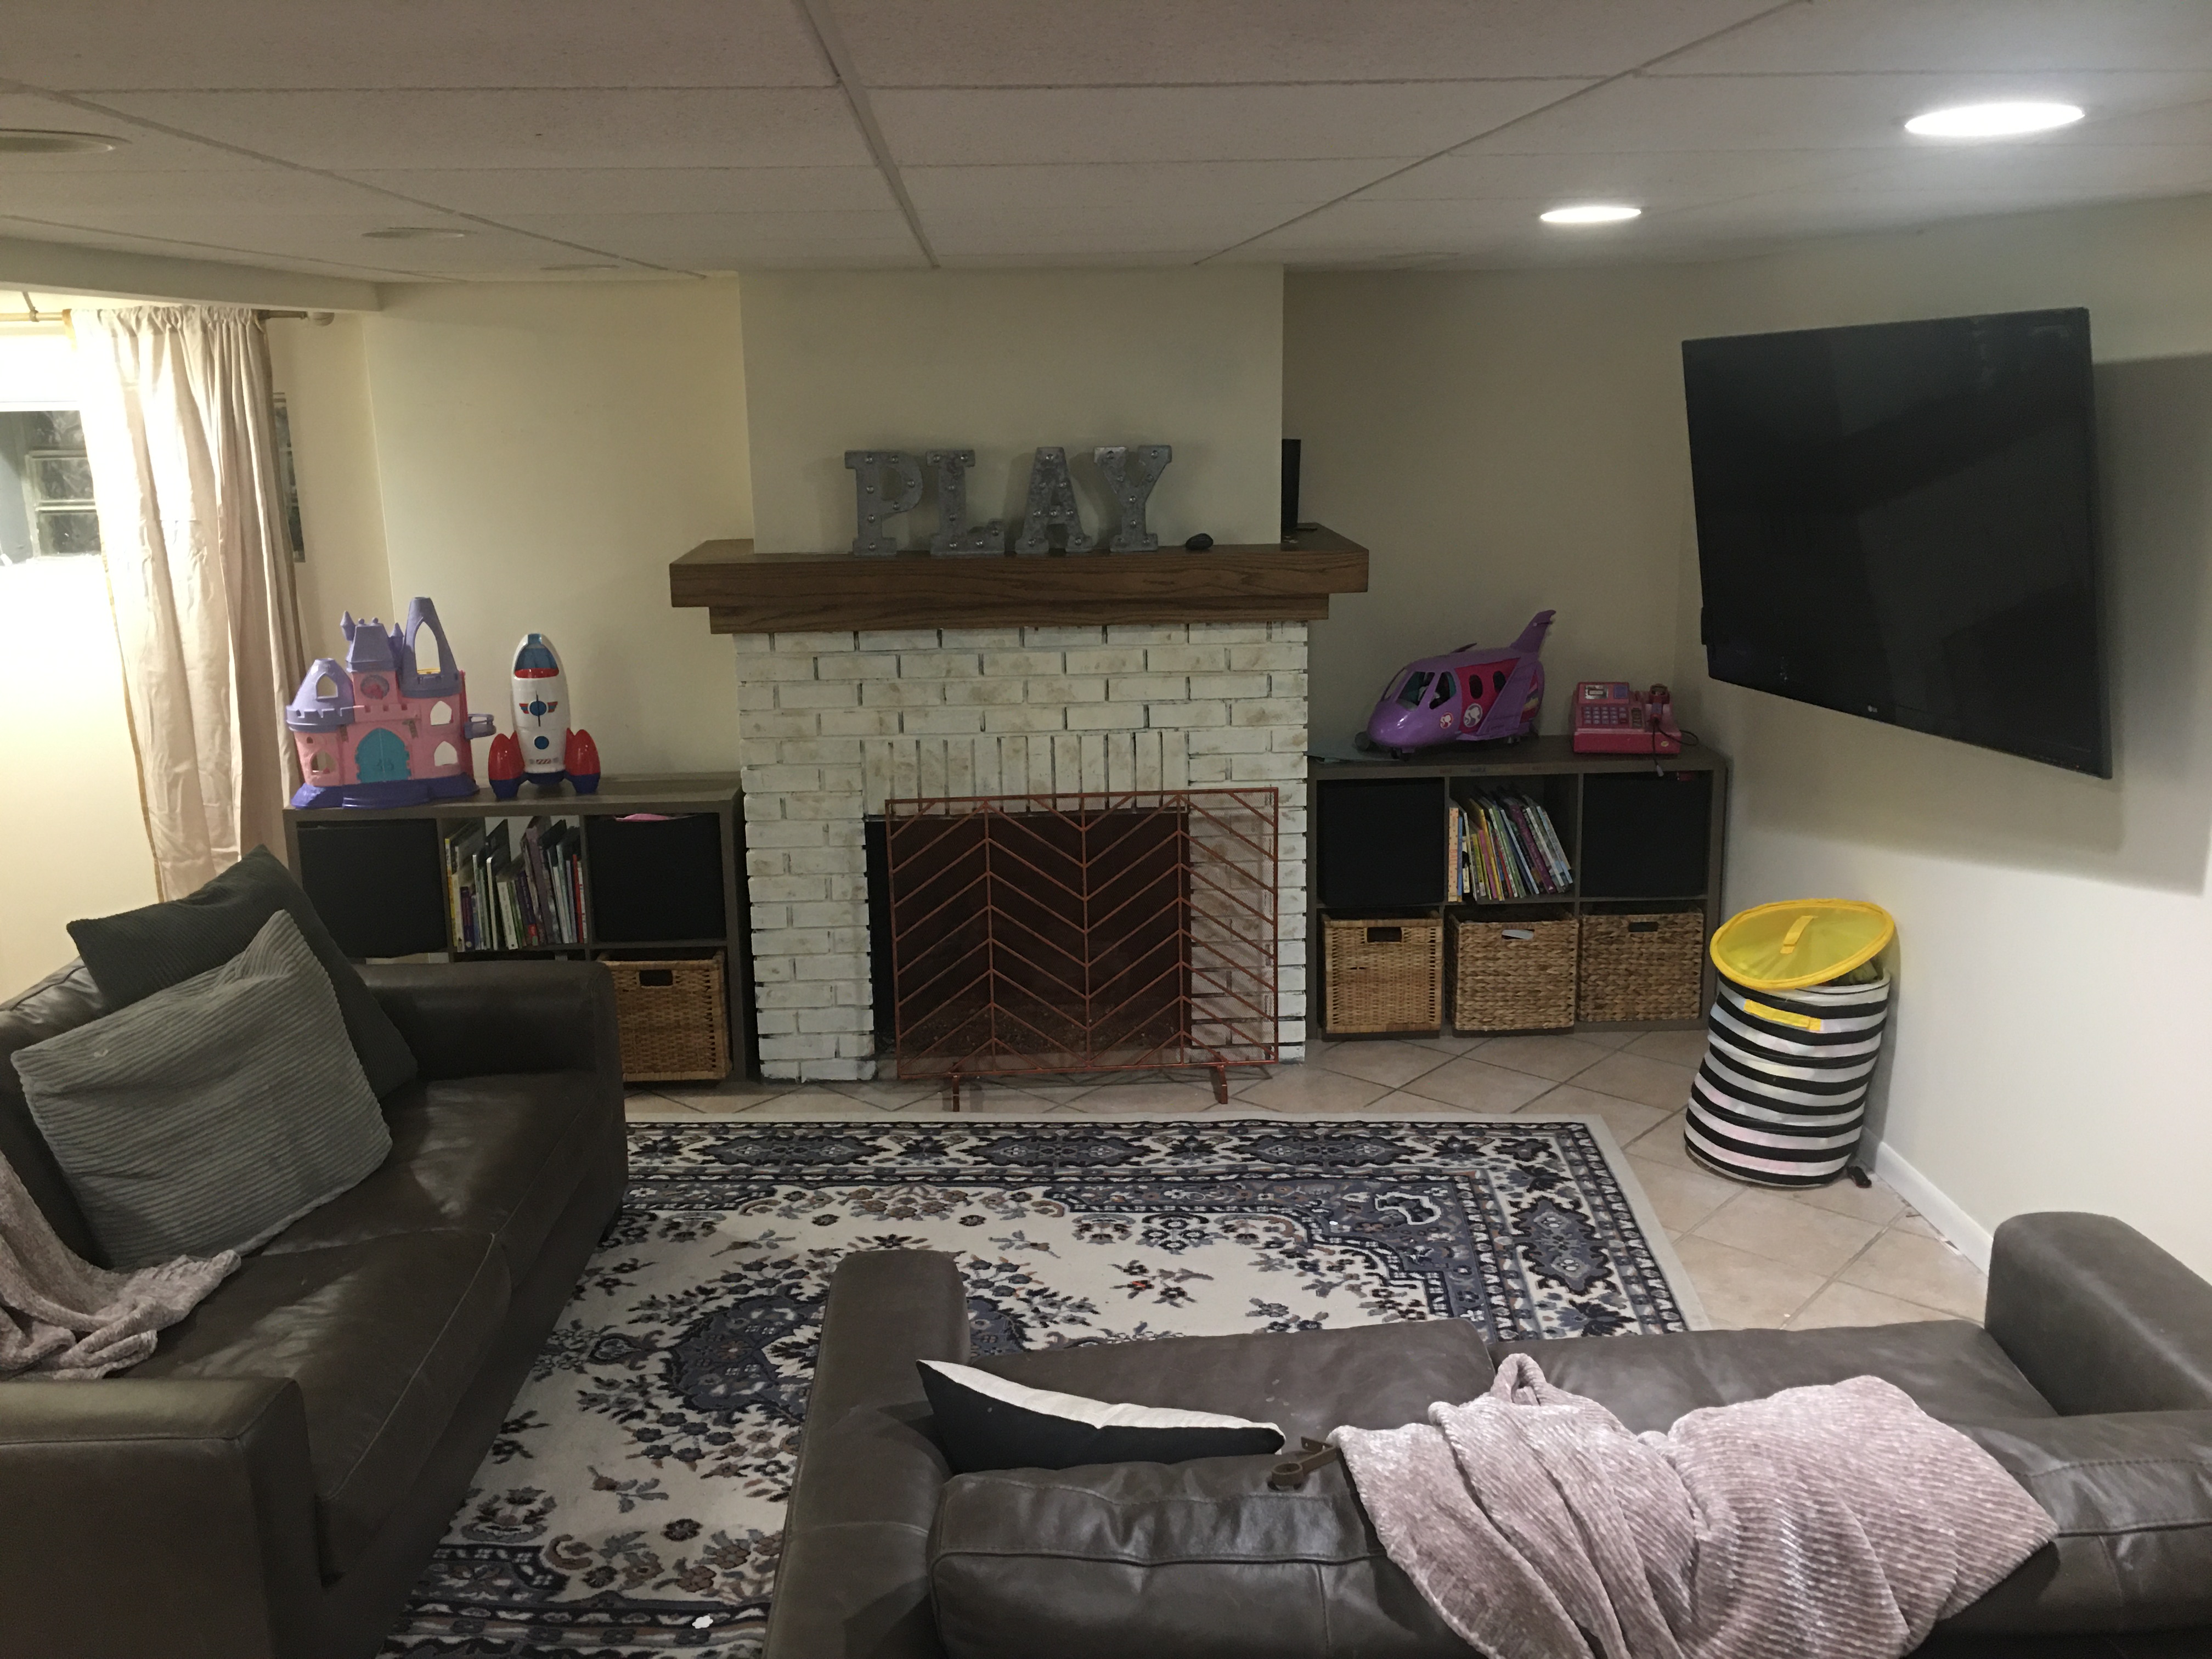
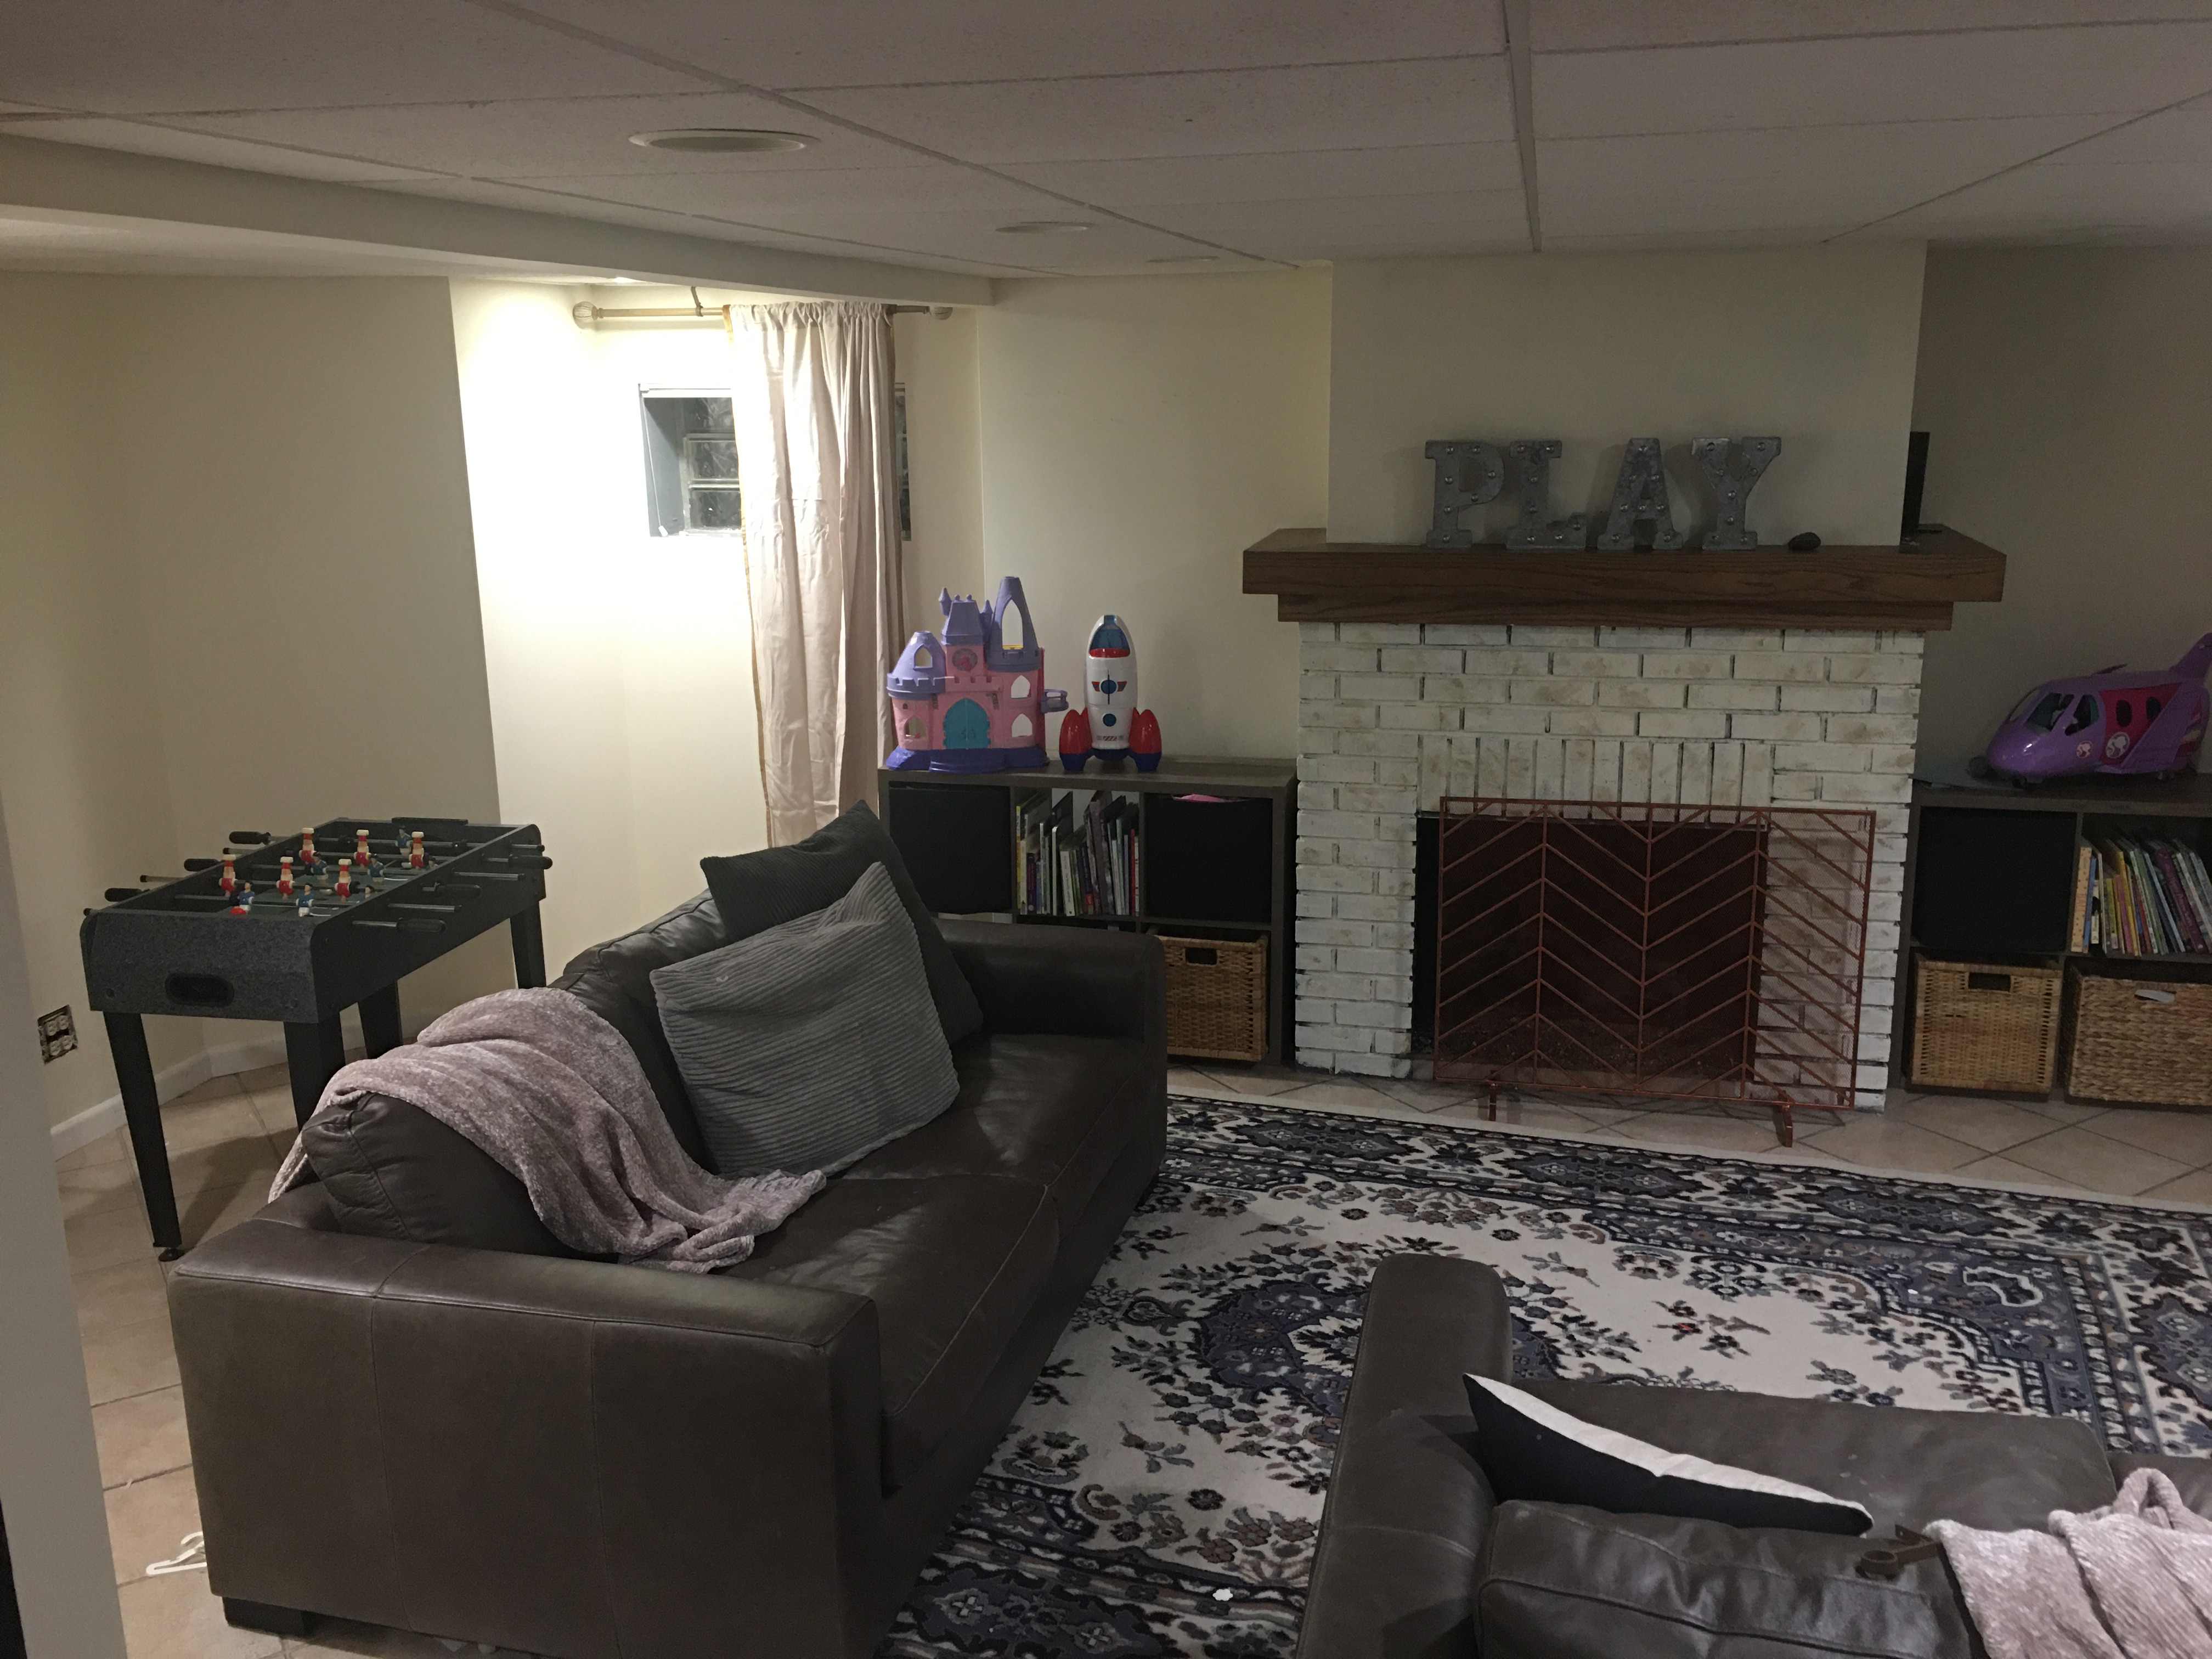
Our basement was a blue/gray color and since we only have one window down there it made it feel pretty dark. While I love the look of a dark-colored and moody basement, I wanted to brighten ours up. The color I chose is Behr, Cotton Knit. I used it on the walls and the fireplace.

Step 3: Re-Imagine an Unused Nook

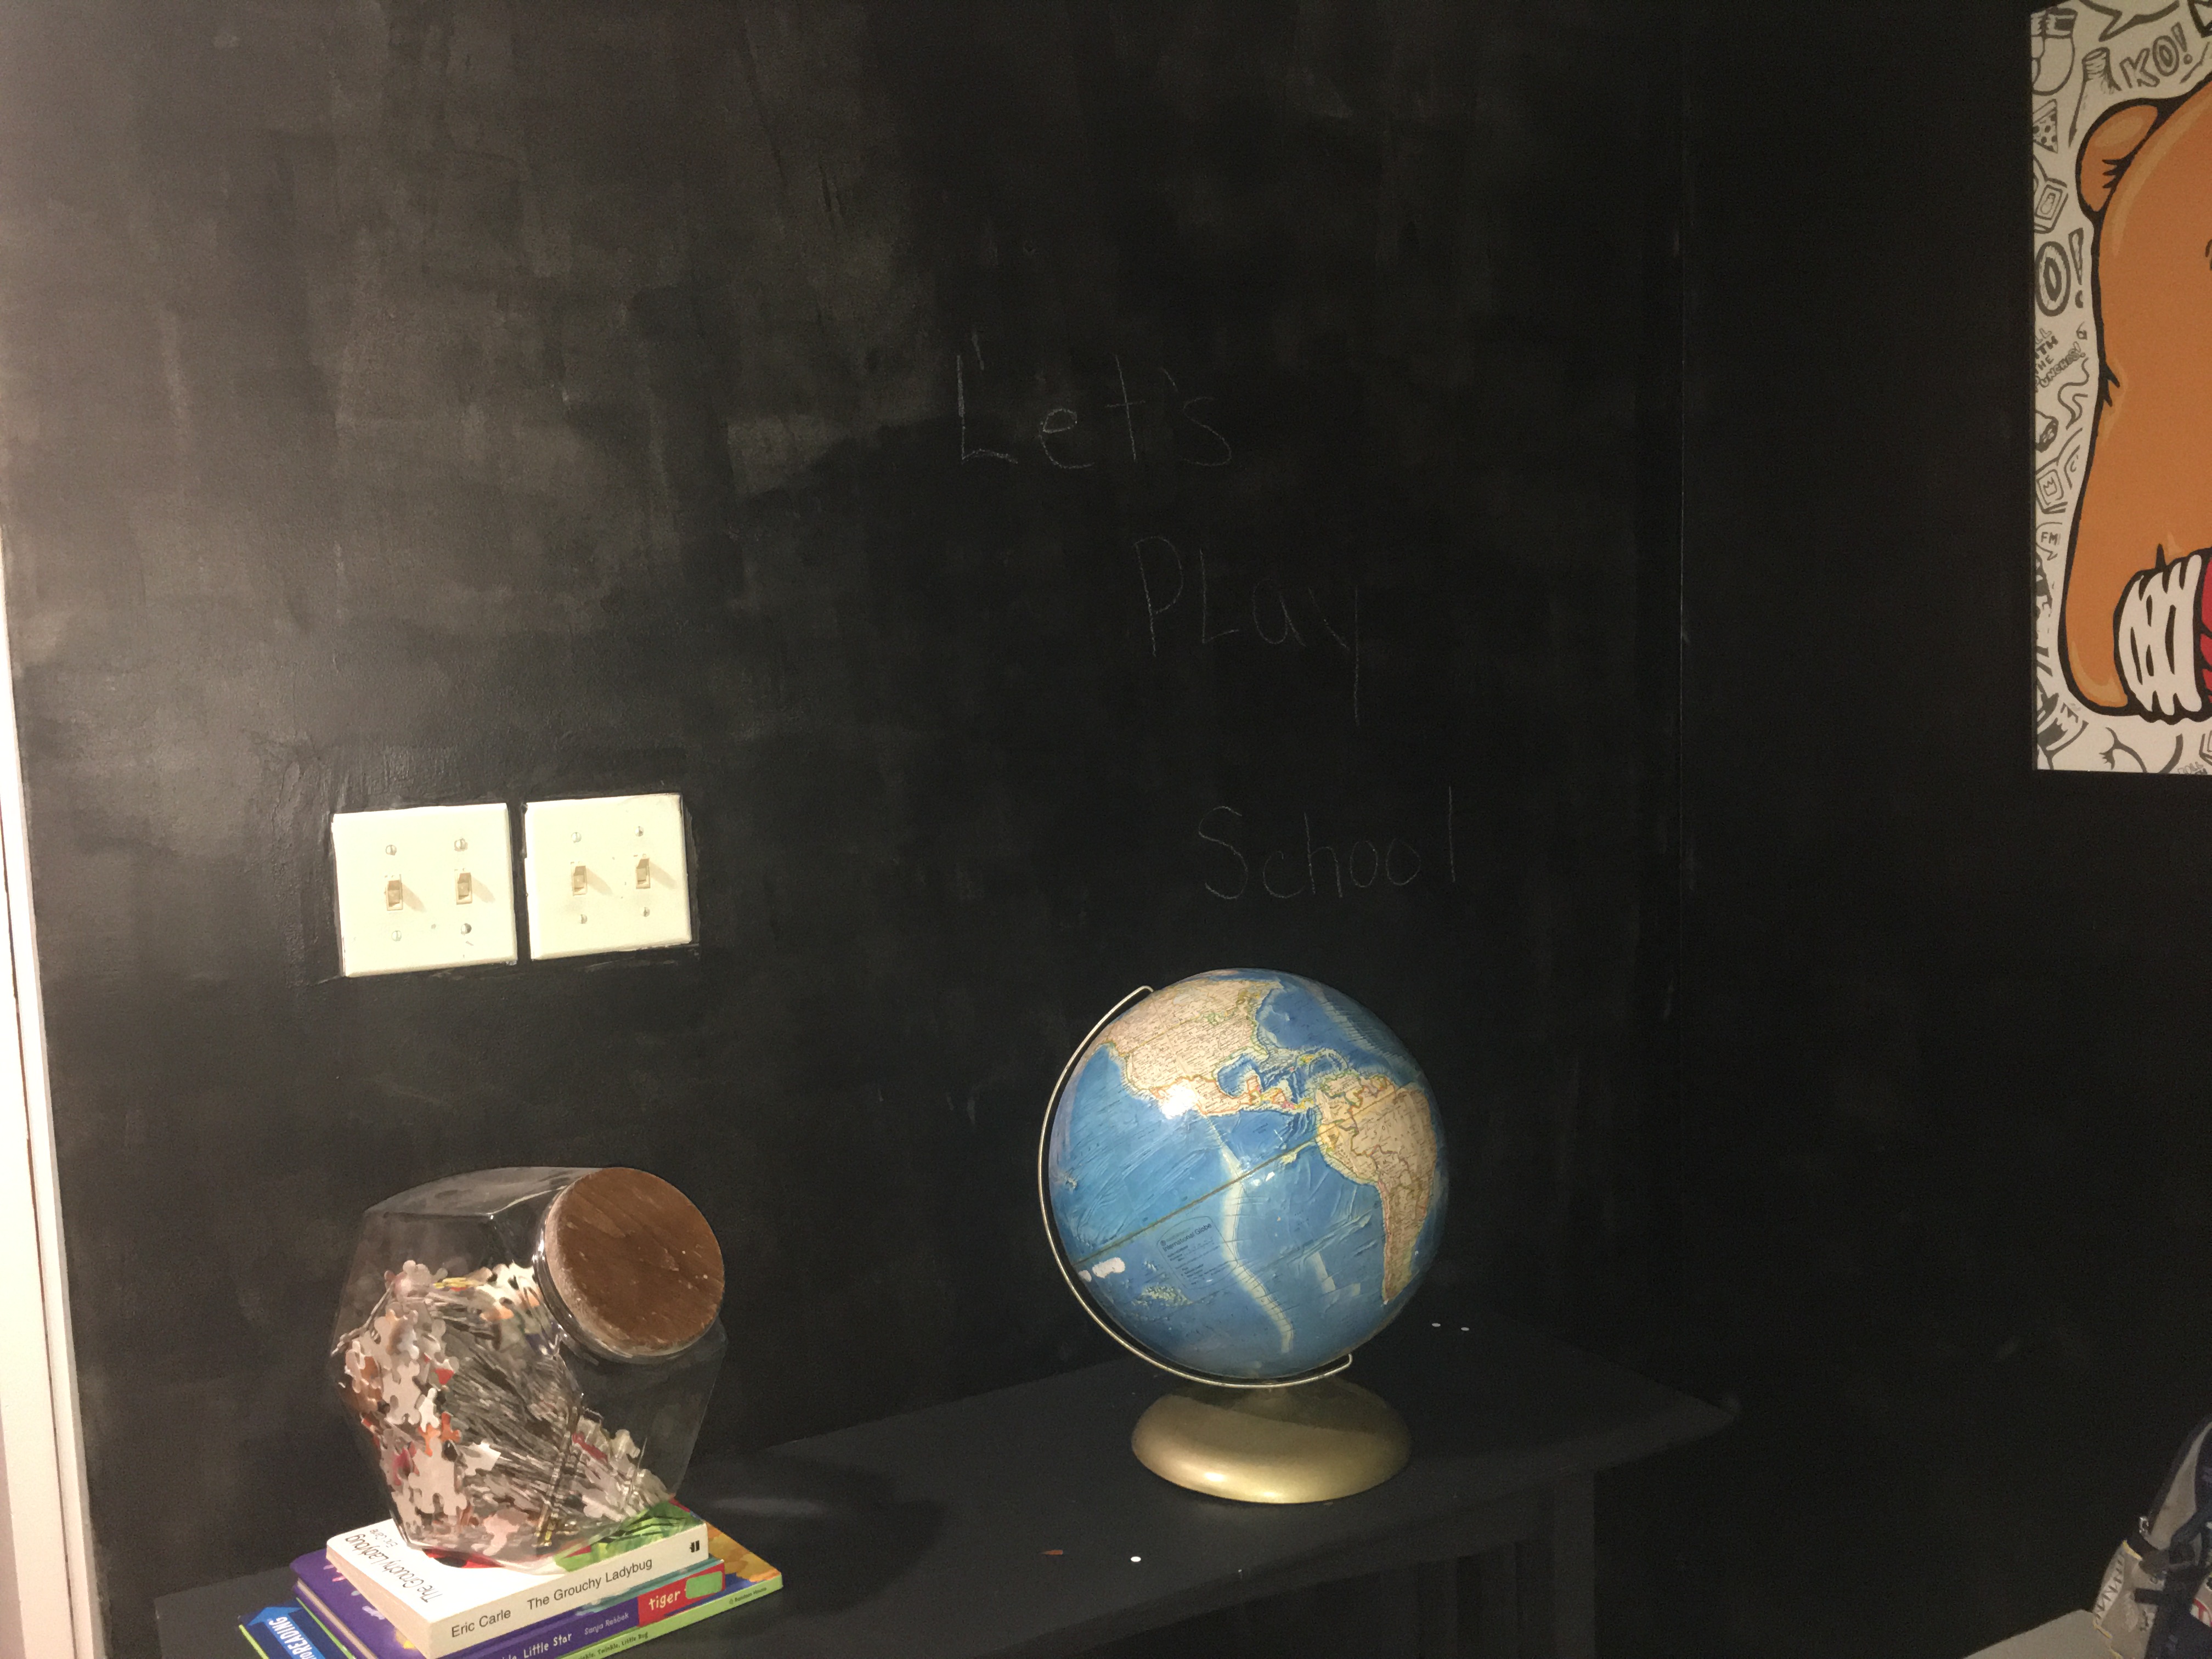
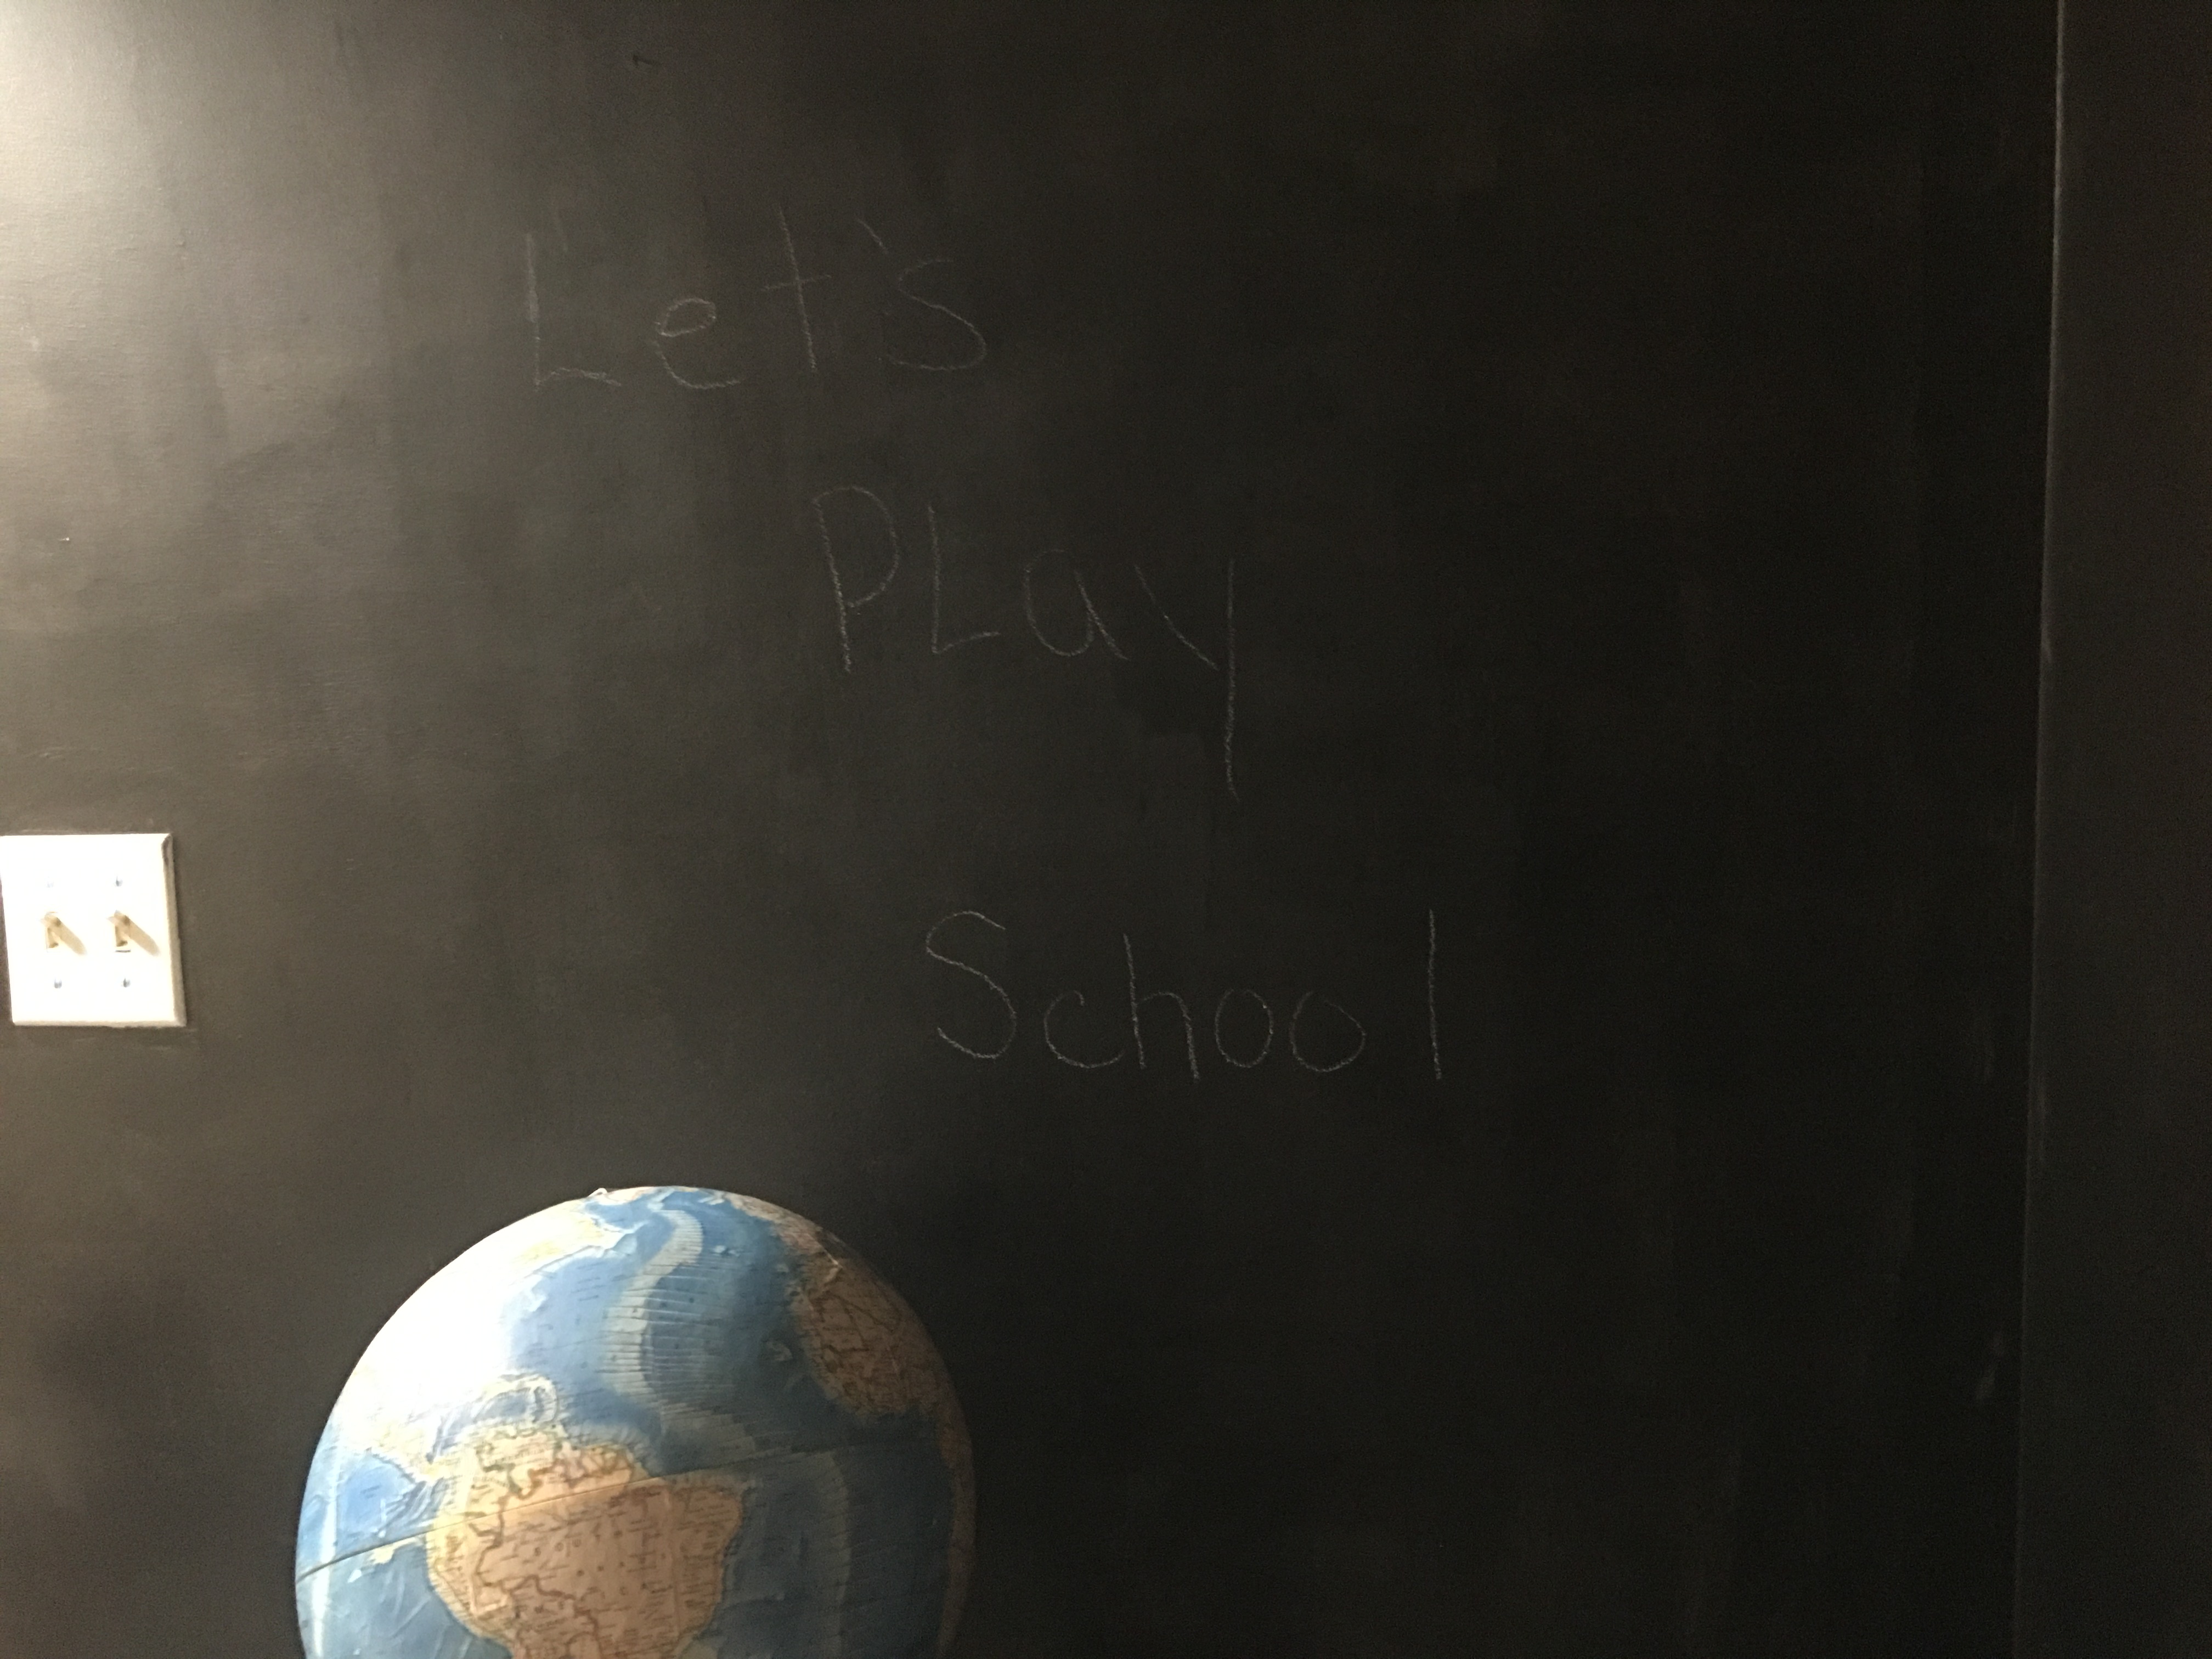
We have a little nook in the basement that’s pretty small. We will likely do a storage solution in it one day For now, the kids voted for mini-play school. I used Rustoleum Chalkboard Paint, a table, stools, and a globe we already had to set it up. The only cost here was the paint but it’s a fun new way to use an unused space.

Step 4: Use Your Existing Storage

We already had these six-cube storage organizers (@Amazon) in weathered gray. I also had a set of square wicker baskets @Amazon that go inside. We made a pact to only keep toys that would fit inside these baskets. We used what we already have to organize each basket by theme. A couple of their favorite larger items sit on top and the rest of the floor space is now open to play.

$100 2-Day Basement Playroom Make-Over Before and After Photos

BEFORE

AFTER

$100 basement remodel$100 playroom makeover$100 playroom remodel2 day playroom makeoverBasement makeoverbasement remodel ideasbasement school ideasBehr cotton knitbehr cotton knit basementbehr cotton knit picturesbehr cotton knit wallschalk paintchalk paint ideaschalk paint wallschalkboard ideaschalkbooard paint wallsdiy basementdiy kids schooldiy play schoolfireplace brick ideasfireplace brick paintfireplace cotton knitfireplace diyfireplace makeoverideas for kids schoolideas for play schoolkids play schoolkids playroom schoolkids school plzyroomMade by kidsmade by kids coolayroom schoolplay school diyplay school ideasplayroom makeoverplayroom makeover on a budgetplayroom organizationplayroom remodel ideas #madebykidsco #madebykids #behr #behrpaint #Rustoleum #Rustoleumpaint #Rustoleumdiy

Easy Pillsbury Cinnamon Roll Easter Bunnies

It doesn’t get any easier (or cuter) than these super simple cinnamon roll Easter bunnies. With only 1 ingredient, you don’t even need a recipe! These are great for an Easter brunch and Easter morning.

Check out our how-to video on the Made by Kids YouTube channel for instructions or read on below!

  1. To start, buy a tube of your favorite cinnamon roll. Use one cinnamon roll as the face and keep 1-2 more back to cut and use for the ears

2. Unwrap the cinnamon roll and make your ear shape

Cinnamon Roll Bunnies – Made by Kids

3. Keep in mind that the roll and the ears will expand as they bake so give plenty of room. I used a little tin foil to keep the ear shape

4. Let the bunnies cool and add your icing

5. If you wish you can use chocolate chips and jelly beans to make a bunny face

More Easter Fun Below!

DIY Hoppy Easter Banner

Kid-Friendly April Fools’ Jokes for Kids

This year for April Fools’ Day we decided to let the kids think of their own pranks for each other as well as us parents. Check out our YouTube channel to see how the pranks played out! We hope you enjoy trying one of these kid-friendly April Fools’ Day pranks with your family!

We had mayonnaise milk for our little guy (total fail! He liked it!), spicy spaghetti for our middle, and a chocolate onion “cupcake” for dad!

Prank #1: Mayonnaise Milk

Mix milk and mayonnaise as desired. Serve to your victim and wait for their reaction! In our case, there was no reaction so don’t be afraid to add more mayo!

Prank #2: Spicy Spaghetti

Add pasta sauce and hot sauce or spicy salsa as desired. We went mild with this since it was for our little one but you can go as spicy as you’d like for an adult or older kiddo.

Prank #3: Onion Cupcake

Grab a cupcake wrapper, an onion, and store-bought frosting for this kid-friendly April Fools’ joke. We left the onion whole and frosted it but you can also slice it in half and add it to the cupcake wrapper to give an extra onion smell and taste to your “cupcake”. Place the onion in a cupcake wrapper and frost it and sprinkle it as you would a cupcake.

Happy April Fools’ Day!

Peep Cake Pop Recipe – Easy Easter Cake Pops

Peep Cake Pop - Poor Girl's Guide Chicago

Peep Cake Pop – Poor Girl’s Guide Chicago

Weโ€™re giving you some of our favorite (and cheap) ideas for Easter. Try these adorable “Hatching Chick” Peep Cake Pops this Easter. Each Peep cake pop has a hatching chick added to a box cake mix cake pop. This is easy and fun kids Easter baking. They will love seeing the whole dessert come together. Try this easy kid-friendly Easter dessert with your little ones!

Ingredients *Makes 24 cake pops

  • 1 Box Cake Mix (Your choice)
  • 1 Can Frosting (Your choice )
  • 2 boxes of white chocolate chips
  • 24 Cake pop sticks
  • 24 Peeps
  • Styrofoam block or cake pop block
  • Clear treat bags (if desired)

Amazon also sells cake pop kits with clear bags, sticks, and a cake pop holder for under $11.

81ACIKI2y7S._AC_SL1500_

Click to purchase @Amazon

Instructions

  • Bake cake as instructed
  • Let cake cool
  • Crumble cake as small as possible in large bowl
  • Mix in frosting by hand slowly
  • Shape cake in to small ball/egg shapes, use an mini ice cream scoop if you have one
  • Roll the balls on to a plate covered in wax paper
  • Melt half the chocolate as instructed (double boil or microwave)
  • Dip half the ball in chocolate and place back on the plate with wax paper
  • Put them in the freezer for about 20 minutes
  • While pops are in the freezer, cut the faces off the peeps and set aside
  • Melt the remaining chocolate and place small amounts at a time in cup
  • Remove cake balls from freezer, place a stick in each
  • Dip cake balls carefully in to the cup of chocolate so they are fully covered
  • Let the excess chocolate drip off
  • Take the Peep and place it on the front of the cake pop, push it lightly so it sticks
  • Place cake pops in the styrofoam block and put them in the freezer
  • Serve them as is or individually wrapped in clear baggies or treat bags

Continue reading

D.I.Y. Heart-Shaped Valentine’s Day Cake Recipe

The kids and I created a heart-shaped cake for Valentine’s Day! This recipe is easy and tastes delicious. The heart cake is a vanilla cake with buttercream frosting. We used red food coloring to make the cake batter as well as the frosting pink and festive. The best part about this cake is that you don’t have to go out and buy a special heart-shaped pan. You can get the heart shape using one square pan and one circle pan. Try this easy-to-make Valentine’s cake recipe for kids. The kids and adults will love this pretty Valentine’s heart cake recipe. Happy Valentine’s Day from all of us at Made by Kids!

Ingredients

  • 3 and 2/3 cups cake flour (leveled)
  • 1 teaspoon salt
  • 1 teaspoons baking powder
  • 1 teaspoon baking soda
  • 1 and 1/2 cups (3 sticks) unsalted butter, room temperature
  • 2 cups granulated sugar
  • 3 large eggs + 2 additional egg whites, room temperature
  • 1 Tablespoon pure vanilla extract
  • 1 and 1/2 cups buttermilk, at room temperature
  • Red or pink food coloring (as much as desired)
  • Vanilla Buttercream Frosting
  • 1 and 1/2 cups unsalted butter, softened to room temperature
  • 5 and 1/2 cups confectionersโ€™ sugar
  • 1/3 cup whole milk or heavy cream
  • 1 and 1/2 teaspoons pure vanilla extract
  • 1/8 teaspoon salt
  • Red or pink food coloring (as much as desired)
  • Sprinkles (as much as desired)

Directions

  • Preheat oven to 350ยฐF (177ยฐC)
    Grease (or line with parchment paper) 9×9 (or 8×8 square pan) + a 9-inch circle pan
  • Whisk the dry ingredients together in one bowl including the cake flour, salt, baking powder, and baking soda together. Set this bowl aside.
  • Using a stand mixer or hand mixer beat the wet ingredients including the butter and sugar together. Add the eggs and egg whites one by one. Add the vanilla until well combined.
  • Add the buttermilk slowly. The mixture will look like curdled milk. This is OK!
  • Add red or pink food coloring until you get the color you desire. You’ll need more color than you think to get the cake a dark pink or red!
  • Pour batter evenly into each pan and bake at 350ยฐF for 23-25 minutes.
  • Let cakes cool for 30 minutes. Flip cakes over to remove them from the pans and let cool another 15 minutes.
  • While cakes are cooling, make your frosting.
  • Once cakes are cooled, you can turn the square cake to the side making a diamond shape. Cut the circle in half. These halves go on the top of your square to form your heart.
  • Add some frosting in between the shapes to help hold them together. Frost the cake and sprinkle as desired.

Tips Using cake flour helps to keep cake moist and fluffy. Ingredients brought to room temperature will help them combine easier making for a smoother batter.**

Check out the full baking video and episode outtakes below and on our YouTube Channel @ Madebykids!